3D Mode Guidelines
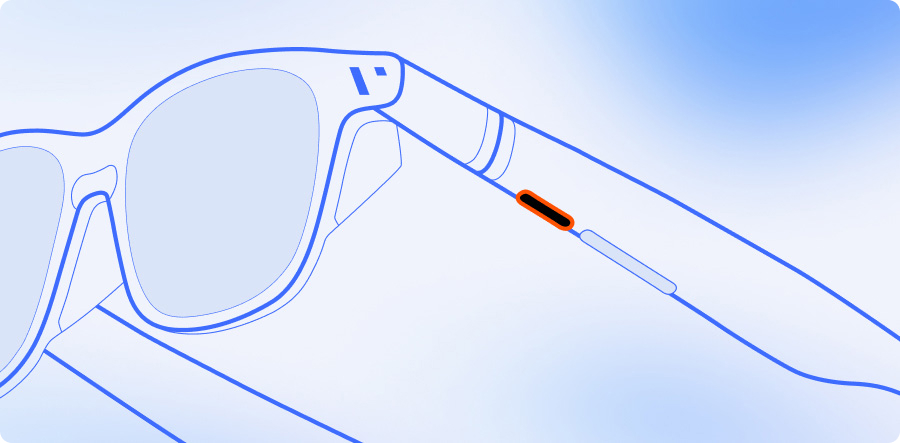
Enable 3D Mode on XR Glasses
VITURE XR Glasses natively support full SBS (Side-by-Side) 3D video at 3840×1080 resolution.
Notes: All VITURE glasses currently support only Full SBS (Side-by-Side) format for 3D content. Immersive 3D works without any compatibility concerns. However, when watching videos or playing 3D games, please make sure to select the correct 3D format; choosing the wrong format may result in compatibility issues.
To try 3D Mode in gameplay, play the sample video clip in fullscreen using your XR Glasses:
Explore more Full SBS 3D videos in this YouTube playlist.
Immersive 3D
Immersive 3D is the world’s first real-time 2D-to-3D conversion feature built into XR glasses, powered by cutting-edge AI.
This revolutionary technology combines advanced artificial intelligence with VITURE’s proprietary 3D algorithms to transform your digital content into stunning immersive visuals. Whether you're enhancing productivity, enjoying entertainment, or gaming, Immersive 3D offers a whole new level of realism and depth.
By analyzing each frame in real time, the system identifies depth cues and spatial relationships to generate natural, high-quality 3D effects — all with minimal latency.
Immersive 3D is available in two forms:
Learn more about Immersive 3D:
Watch 3D Movies
Connect to Compatible Devices
You can watch 3D movies by connecting your XR Glasses to a compatible device and using them as an external monitor.
Check the compatible device list.
Note: Some phones support DP Alt Mode but cannot output the resolution required for 3D video. For example, the Google Pixel 8 and 9 series do not support switching to 3D Mode. To ensure compatibility, your device must support video output at 4K resolution or higher.
Follow these steps to play 3D SBS movies on your Android phone using VLC Media Player:
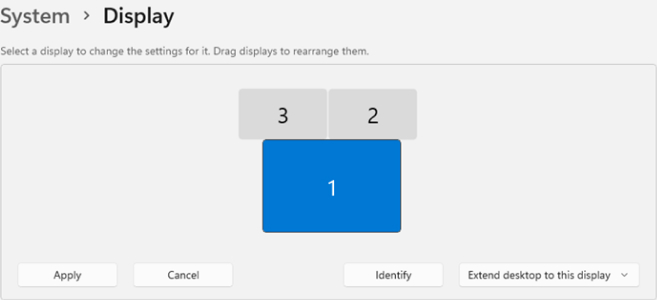
When you watch a 3D video on your PC or MacBook, enable 3D Mode on the XR Glasses, and ensure you extend desktop to the XR Glasses. Then open a video and move the media player to the screen of your XR Glasses, and play in fullscreen.
Some Windows PCs do not support 3840 × 1080, if the information is unclear, please contact the manufacturer of the computer you are hoping to use with the XR Glasses.
To experience 3D Mode in movies, please watch the sample video clip in fullscreen on your XR Glasses.
With the Neckband
The Neckband offers enhanced 3D features with auto-detection and side-by-side 3D support - all so you can enjoy your favorite blockbusters the way they were meant to be seen.
Streaming Apps
If you are based in the United States, you can use streaming services like Prime Video, Netflix, YouTube, Vudu, and others to watch 3D movies online.
Local Files
Transfer your 3D videos to the Neckband by connecting the Neckband to your PC/MacBook via USB-C-to-USB-C cable, then open 3D Player app on the Neckband and select a video. Your XR Glasses will automatically switch to 3D Mode when playing a full SBS 3D video.
See also: Transferring Files To Your Neckband
Troubleshooting
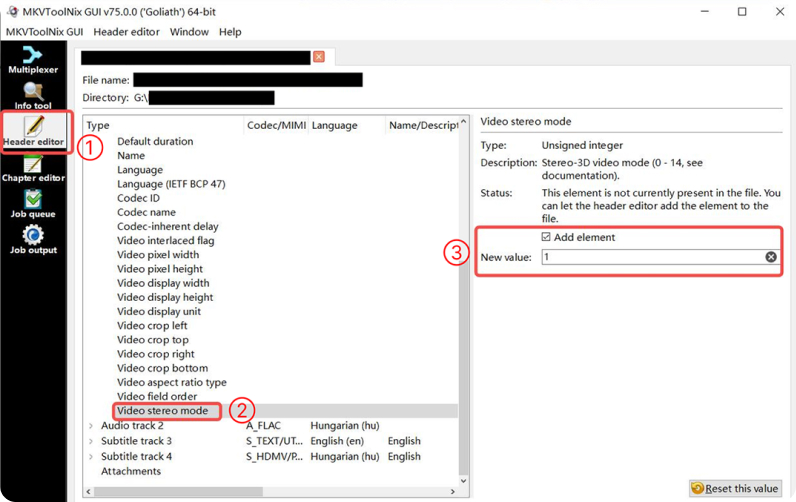
If you attempt to play a SBS 3D .MKV format video, the aspect ratio may not be correct. You can try using MKVToolNix to convert the file and fix this issue. Download MKVToolNix and install.
Click "Header editor," and set "Video stereo mode" to 1. This will allow most SBS 3D videos to play properly.
Play 3D Games with Your PC
Play Games with Immersive 3D
You can play games after launching Immersive 3D for Windows, but please note that this will significantly increase battery consumption and may reduce gaming performance.
We recommend reviewing the system requirements and our benchmark results before enabling this feature.
For the best experience, we suggest playing games only on systems equipped with NVIDIA RTX 4080 or higher graphics cards.
Native 3D Games
You can play native SBS video games by connecting XR Glasses to your PC. Here are some recommended video games that support 3D graphics. To determine whether or not your device supports these games, ensure review the system requirements that are published by the game developers.
List of Native SBS 3D Games
| Title | Platforms | First release year |
|---|---|---|
| Shadow of the Tomb Raider | Windows | 2018 |
| Rise of the Tomb Raider | Windows | 2016 |
| Elite Dangerous | Windows, macOS (OS X) | 2015 |
| Trine 3: The Artifacts of Power | Windows, Linux, macOS (OS X) | 2015 |
| Trine 2 | Linux, Windows, macOS (OS X) | 2013 |
| Crysis 3 | Windows | 2013 |
| Doom 3 BFG Edition | Linux, Windows | 2012 |
See more native 3D games: Native 3D - PCGamingWiki, you can try more games on the list, but we cannot guarantee that every game on the list works well with VITURE XR Glasses.
Reshade + Depth3D
If you want more 3D games on your PC, we strongly recommend using Reshade + Depth3D to play 3D games. It is easy to configure and is able to play many games in 3D Mode. See the game compatibility list of ReShade.
ReShade supports all of Direct3D 9, Direct3D 10, Direct3D 11, Direct3D 12, OpenGL, and Vulkan. A computer with Windows 7 SP1, 8.1, 10 or 11 and .NET Framework 4.6.2 or higher installed is required.
Make sure your PC supports dual monitors and has a USB-C DP 4K port.
Instructions
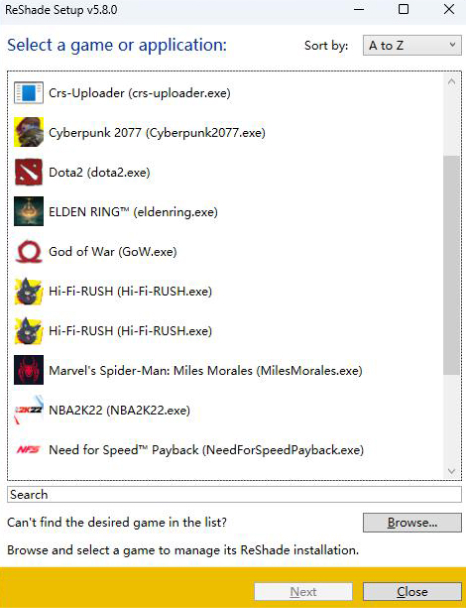
Download ReShade and launch.
Select a game.
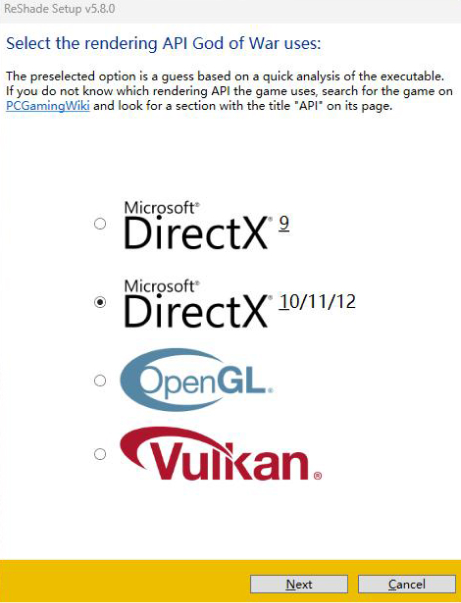
Select the rendering API that the game uses. Click "Next" to continue.
If you are using the latest version of ReShade, check Depth3D to continue. For older versions, you need to download Depth3D and watch this video tutorial.

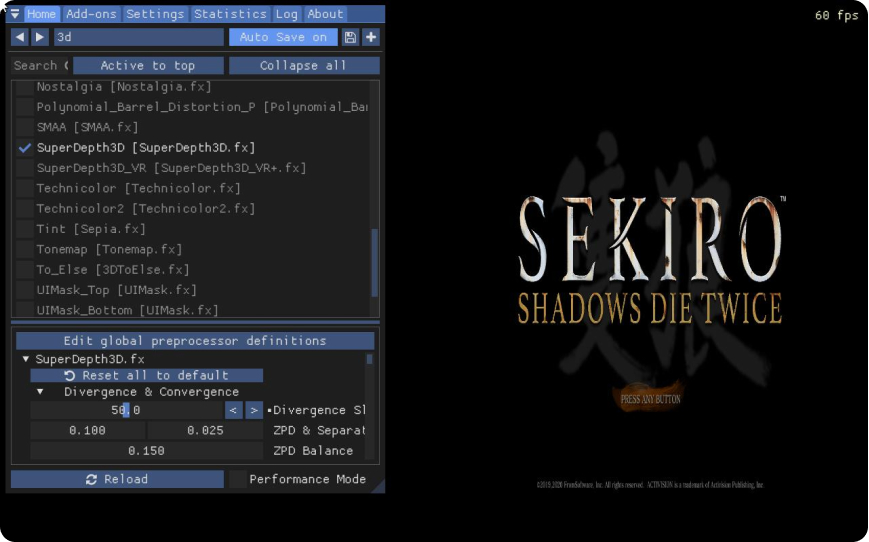
After downloading the effect packages, start the game and press Home on the keyboard. Select SuperDepth3D on the overlay menu, and press Home again to close the overlay.
Connect your XR Glasses to your PC, switch to 3D Mode.
Because Half-SBS and Full-SBS use different formats, using Reshade or similar 3D conversion tools may lead to incorrect output on the glasses. To ensure proper Full-SBS rendering, please configure your GPU as follows:
On AMD devices: Set the VITURE display resolution in Windows to 1920 × 1080, then follow AMD’s Custom Resolution instructions to create a 3840 × 1080 logical display mode.
On NVIDIA devices: First set the VITURE display resolution in Windows to 3840 × 1080, then create a 1920 × 1080 custom resolution following NVIDIA’s Custom Resolution guide.
How to Return to Normal Gameplay
Launch a game and press Home on the keyboard, uncheck "SuperDepth3D" and the game will return to normal.
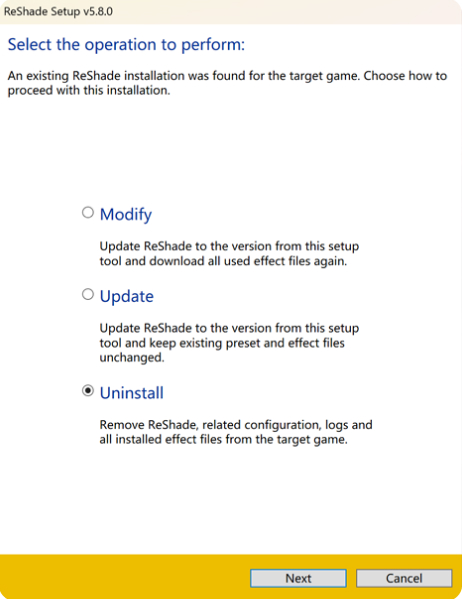
Uninstall ReShade
If you want to uninstall ReShade, you can open ReShade and select a game, then select "Uninstall" in this step. All the ReShade effect packages will also be uninstalled.
Streaming (Using Moonlight/Sunshine)
After configuring ReShade and Depth3D on your PC, you can even use Moonlight and Sunshine to play remotely. Navigate to the Store page on the Neckband and download Moonlight. Then install Sunshine on your PC. Watch the video tutorial to get set up. Or refer to the official Sunshine documentation.
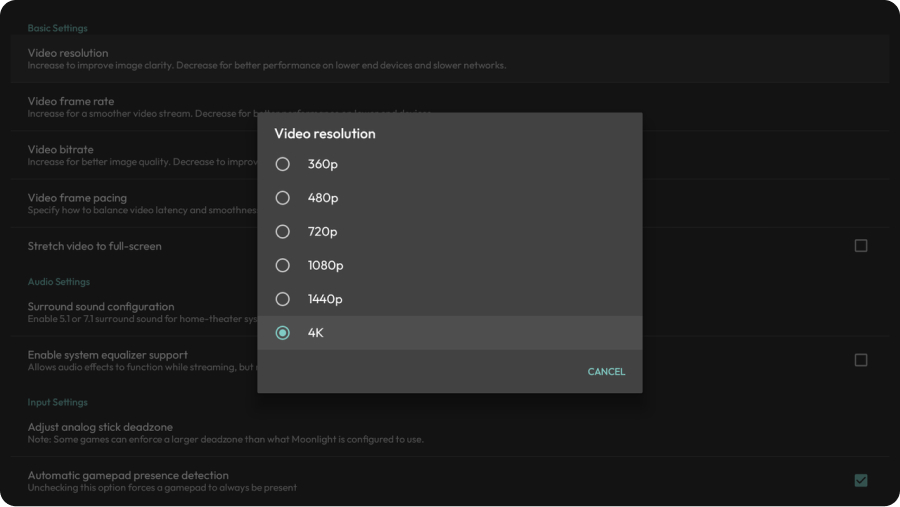
Make sure the video resolution is configured to 4K in the Moonlight settings.
See also: Setup Moonlight & Sunshine