Immersive 3D for Mac: Turn Everything into Stunning 3D
Introduction
Transform your digital world with Immersive 3D, a revolutionary technology that combines advanced AI with VITURE's proprietary 3D algorithms to create stunning immersive environments. Whether you're a professional seeking enhanced productivity, an entertainment enthusiast, or a dedicated gamer, Immersive 3D delivers an unparalleled visual experience that changes how you interact with digital content.
Immersive 3D utilizes state-of-the-art AI processing to convert standard 2D content into rich, depth-enhanced 3D visuals in real-time. The technology analyzes each frame, identifying depth cues and spatial relationships to create a natural, immersive 3D effect that maintains visual quality while minimizing latency.
Download the lastest Immersive 3D for Mac.
Click here to view the Immersive 3D for Mac release notes and full update history.
Note:
Getting Started
Updating Your XR Glasses
Ensure optimal performance by updating the firmware to the latest version. Click the link to install the update.
System Requirements
Supported Languages
Immersive 3D for Mac supports:
The display language defaults to English but will switch to your system language if it's supported.
Download and Installation
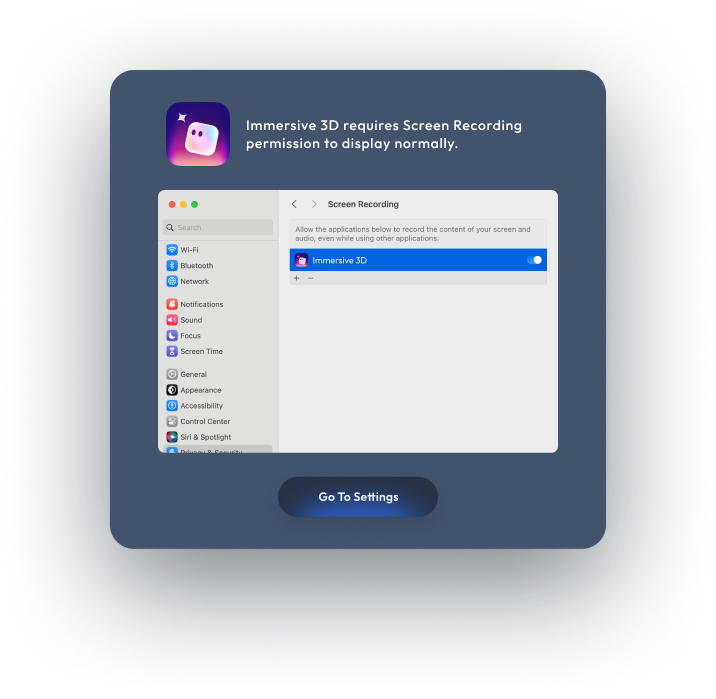
Grant Screen Recording Permission
To display virtual screens on XR Glasses, grant Screen Recording permission:
Connect Your XR Glasses
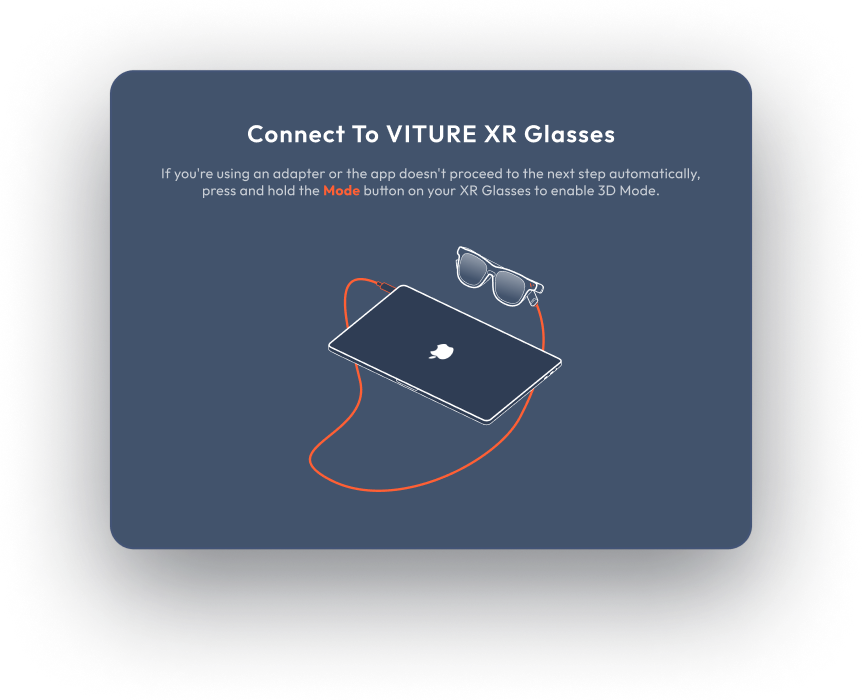
Note: When connecting XR Glasses for the first time, a dialog may appear. Select "Extended Display" and check "Set as Default" in the bottom-left corner. This dialog may appear twice during the initial setup; follow the same steps each time.
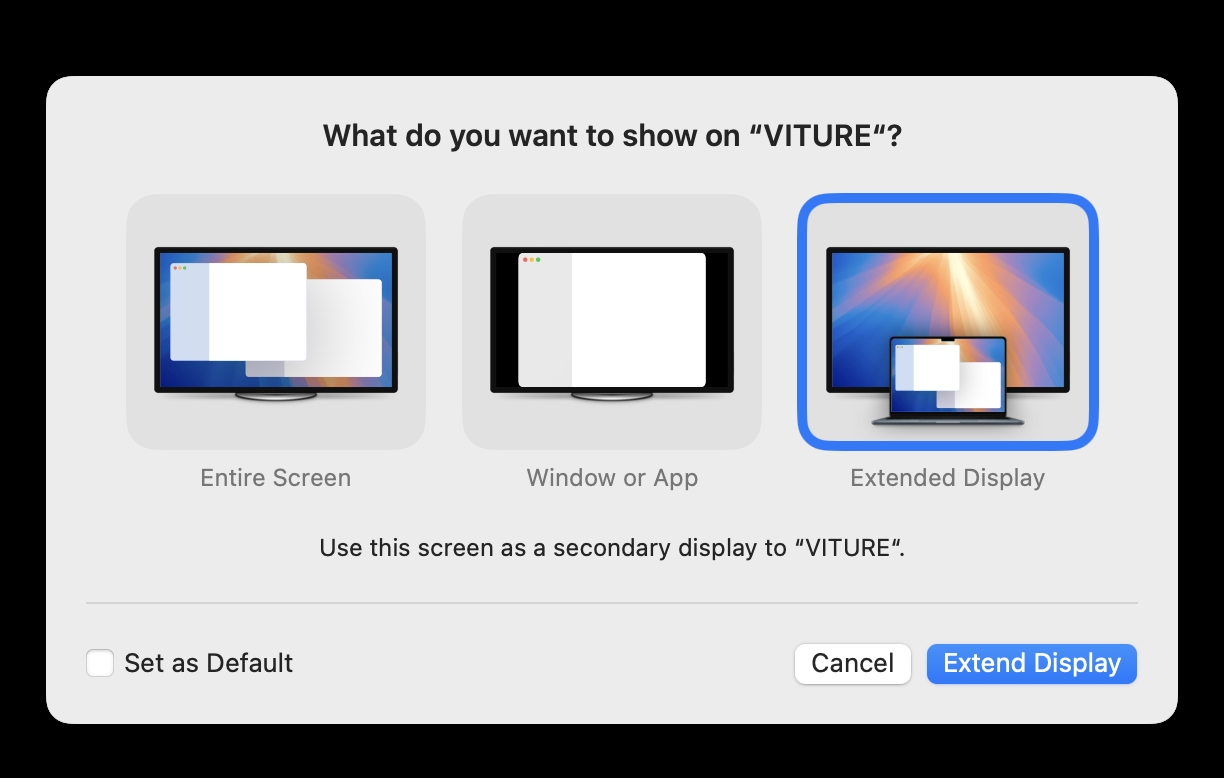
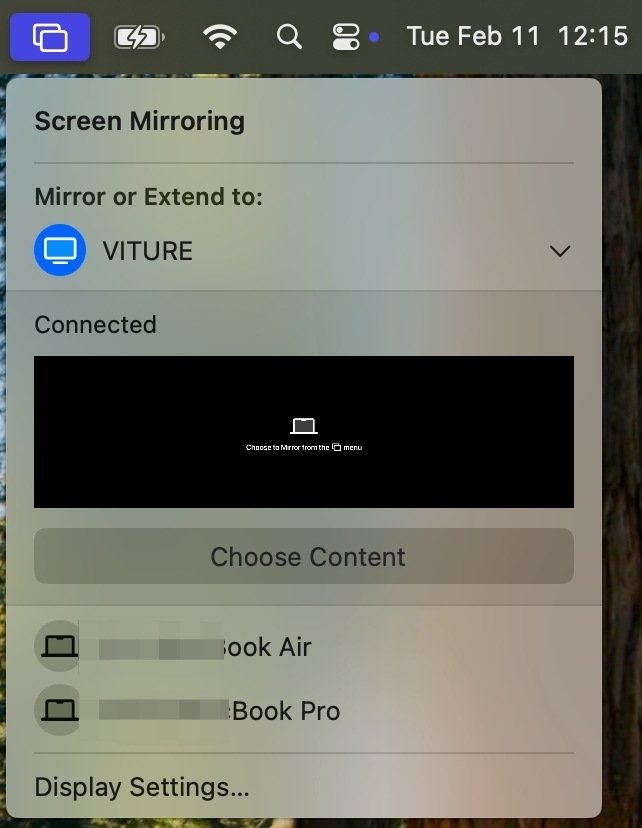
If the dialog above does not appear and the display on the XR Glasses shows a black screen with the text "Choose to mirror from the menu" (as shown in the image below), this typically occurs when enabling 3D Mode or switching to 120Hz. In this case, click the menu bar and select "VITURE" as the Extended Display.
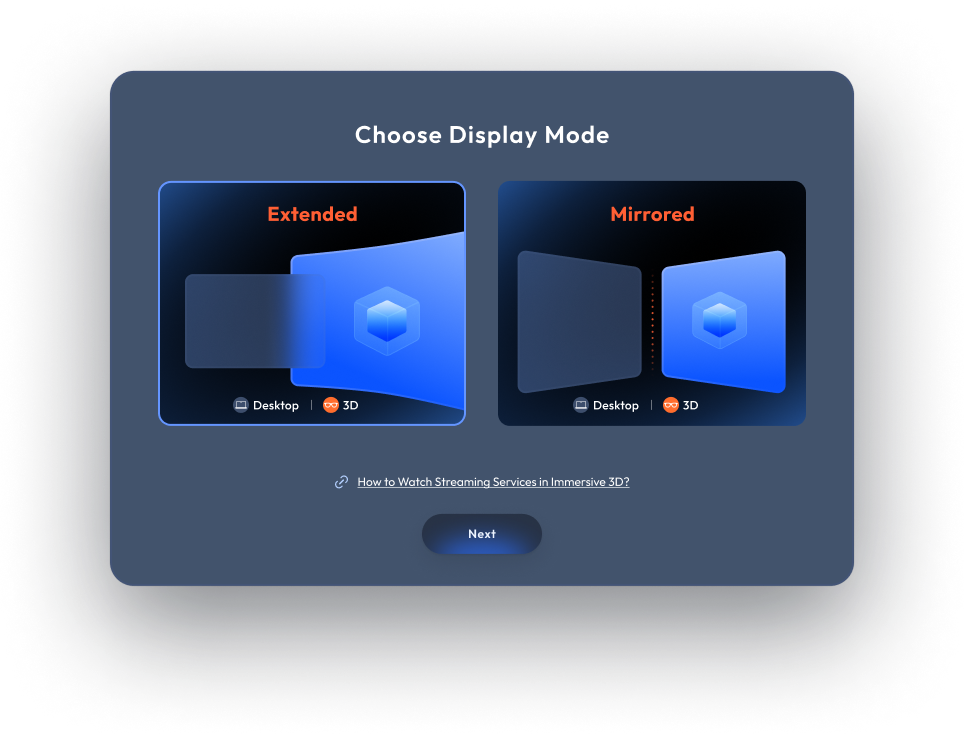
Select Display Layouts
Once connected, you will be presented with two display layout options on the launch page. Select your preferred layout:
Launch the App
After selecting your display layout, click "Launch" to start Immersive 3D. The XR Glasses will automatically switch to 3D Mode.
If 3D Mode fails to activate, reconnecting the XR Glasses typically resolves the issue.
Performance and Compatibility
Performance Specifications
Immersive 3D has been tested across various hardware configurations. Performance may vary depending on device specifications, usage duration, and power consumption.
Content Compatibility
Immersive 3D ensures extensive compatibility with various content and platforms:
Note: Please disable browser GPU acceleration to bypass DRM limitations. Detailed instructions are provided below.
Watch Streaming Services in Immersive 3D
To enjoy streaming services like Netflix or Disney+ in Immersive 3D, follow these steps to configure your browser:
Customize the Preferences
Immersive 3D offers a variety of customization options without requiring you to quit the app. Access the app menu to modify settings.
Switch Display Mode
Easily switch between Extended Mode and Mirrored Mode.
During the switch, the screen may flash or briefly go black. This is normal, and the process will complete in a few seconds.
Disable Built-In Display
Choose this option to turn off your device’s built-in display, allowing operation exclusively on the XR Glasses' display, perfect for privacy-focused work.
Depth Levels
Immersive 3D offers three depth levels to tailor your 3D experience:
Immersive Modes
Special modes are available to optimize performance and quality for specific use cases:
XR Glasses Integration
Immersive 3D includes convenient options for managing your XR Glasses: