Set Up & Get Started
Connect to Compatible Devices
To connect your XR Glasses to a laptop, smartphone, or tablet, follow these steps:
If there is no display on your XR Glasses, try disconnecting any other external displays connected to your device. Some device models support only one external display. Alternatively, connect to a different USB-C port on your device and try again.
To adjust mirror settings, access your device's system settings:
To confirm compatibility with VITURE XR Glasses, refer to your device's manufacturer specifications. Look for keywords such as 'DisplayPort over USB-C,' "DP Alt Mode,' 'Alt DP over USB-C,' or 'Thunderbolt 4'.
Please check this list for VITURE-certified supported mobile devices.
See also: Connect the Neckband to the XR Glasses
Change Display Refresh Rate
This feature is available on VITURE Luma, Luma Pro, Luma Ultra, Beast, and Pro XR Glasses.
Supports Refresh Rate:
Windows PC
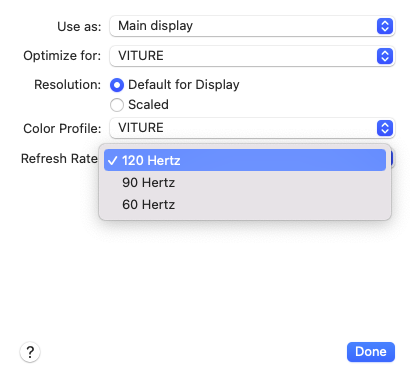
MacBook
SpaceWalker for Desktop (Mac & Windows)
SpaceWalker for Mac and Windows allows you to select a refresh rate (120Hz, 90Hz, or 60Hz) every time you launch the app with Pro XR Glasses.
SpaceWalker app will remember the last refresh rate you selected for your VITURE Pro XR Glasses and use it by default when you launch the app again.
Learn more:
Selecting A Refresh Rate - SpaceWalker for Mac
Selecting A Refresh Rate - SpaceWalker for Windows
SpaceWalker for iOS
To unlock refresh rate selection on iOS, you'll need both Pro XR Glasses and the USB-C XR Charging Adapter connected to your iPhone.
Once connected, an option to choose between 120Hz, 90Hz, or 60Hz will appear within the on-screen menu of SpaceWalker app on your iPhone.
The function to switch the refresh rate directly within SpaceWalker is coming soon for Android.VITURE One Neckband, VITURE Pro Mobile Dock, and VITURE One Mobile Dock only support a 60Hz refresh rate. Adjusting the refresh rate is not supported on these accessories.
Color Tuning & Customize Dynamic Light Effect
This tool supports VITURE Luma Pro XR Glasses. Please ensure that your firmware is updated to the latest version before using this tool.
Note: Use Chrome (Version 98 or later) on a Windows or Mac computer to access the tool. Connect to a full-featured USB-C port that supports DisplayPort Alt Mode.
To customize the color and dynamic light strip, visit the Color Tuning & Dynamic Light Effect tool.
Color Adjustment
For the best preview, drag the tool page to your XR Glasses' display.
You can switch between 5 color modes: True Color, Vivid, Film, Warm, and Cold. These modes match the adjustments available directly on the XR Glasses.
You can adjust the following parameters:
Changes are previewed in real-time. However, you must apply the changes for them to take effect.
The Reset option restores all settings to their factory configuration.
Dynamic Light Effect
Adjust the brightness of each section of the light strip in a 5-second pattern loop, with individual brightness settings for each second. You can remove your XR Glasses and place them on a stable surface to check the changes.
You only need to apply the entire pattern once, not each second.
Note: Enabling the dynamic light effect increases power consumption. If connected to a laptop, tablet, or mobile device, battery life may decrease more rapidly.
Known Issue: If the light strip is set to maximum brightness for each second and section., it may blink slightly. This is a known issue, and we plan to address it in the next firmware update.
Change Color Mode
This feature is available on VITURE Luma, Luma Pro, Luma Ultra, and Pro XR Glasses.
The following color modes are available:
Accessing the Color Mode Menu:
Then:
A UI prompt, similar to the image below, will show the selected color scheme.

Note: Some color modes may be unavailable or missing if your XR Glasses are running an older firmware version. To fully utilize this feature, make sure your XR Glasses are updated to the latest firmware. Click here to update.
Learn more: Update Your XR Glasses
Connect to Handheld Consoles
Set the Resolution on Your Console
While not strictly necessary for using XR Glasses on handheld consoles like Steam Deck or ROG Ally, adjusting your console's settings can enhance your gaming experience.
External Display Resolution
Connect your XR Glasses to your console.
To optimize your gaming experience on Steam Deck, follow these steps:
Adjust Game Settings:
Game Resolution
Configure in-game settings following these steps:
Enable 3DoF on Steam Deck
You only need to directly connect XR Glasses and Steam Deck to use the native IMU data of XR Glasses to enable 3DoF functionality. To achieve a better fixed-position screen effect, you need to install Decky Loader and the XR Gaming plugin on Steam Deck.
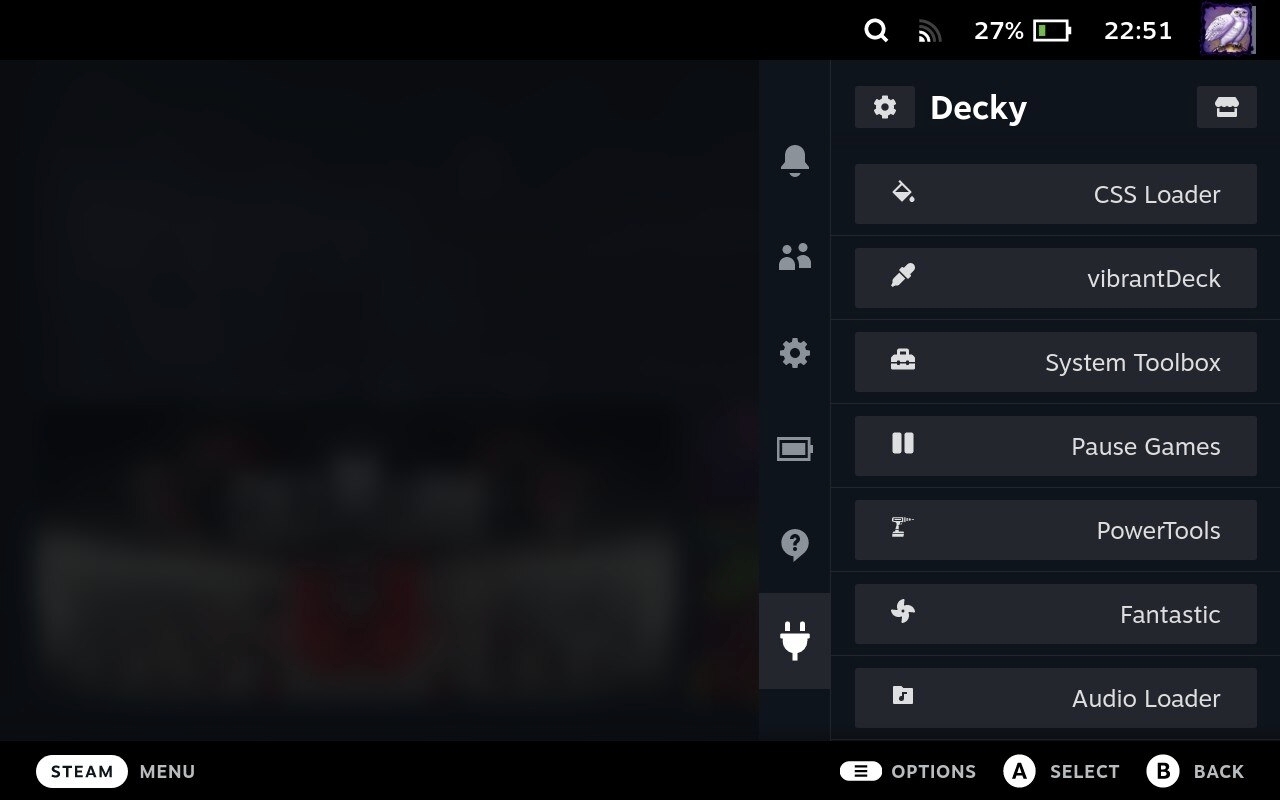
Install Decky Loader
This installation can be done without an admin/sudo password set.
There is also a fast install for those who can use Konsole. Run
curl -L https://github.com/SteamDeckHomebrew/decky-installer/releases/latest/download/install_release.sh | sh
and type your password when prompted.
For more information about Decky Loader, please refer to this GitHub project: GitHub - decky-loader
Install XR Gaming Plugin
Enable 3DoF on Steam Deck
Unleash the Power of XR Gaming Plugin
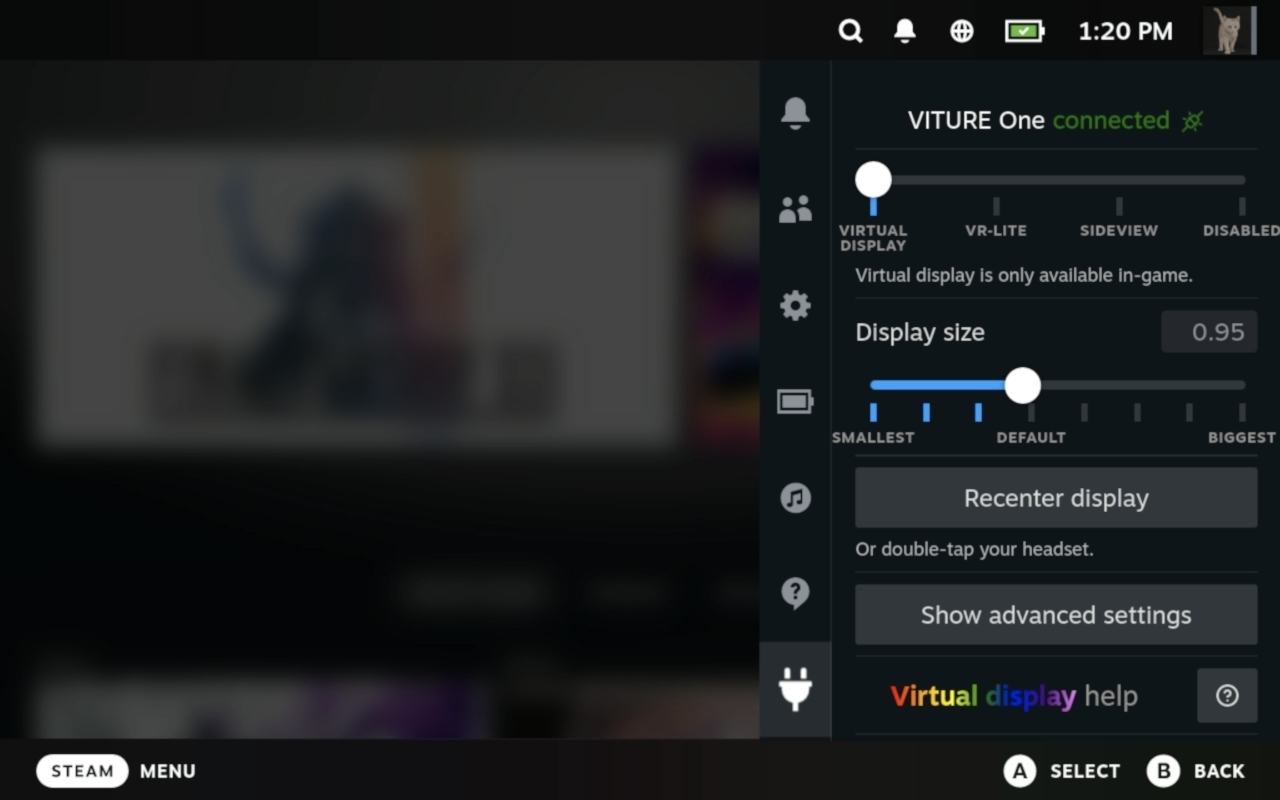
The XR Gaming plugin unlocks a suite of features designed to enhance your gaming experience:
Virtual Display: Pin your game screen in a virtual space, keeping it fixed in your view regardless of head movements. Perfect for strategy games or menus.
Side-by-Side 3D (Advanced feature for compatible games): Enable this mode to control the virtual screen distance and render games in stunning 3D (requires game support).
VR-Lite: Control the in-game camera (mouse look) using your head movements in first-person or third-person games. No VR setup needed!
Sideview: Discreetly display your game in a corner of your vision, allowing you to stay partially aware of your surroundings.
See what the developer are saying about XR Gaming on Reddit: Steam Deck VITURE support is ready! - Reddit
Visit this GitHub project to learn about the latest features and common issues of XR Gaming: GitHub - Decky-XRGaming
Troubleshooting For Steam Deck
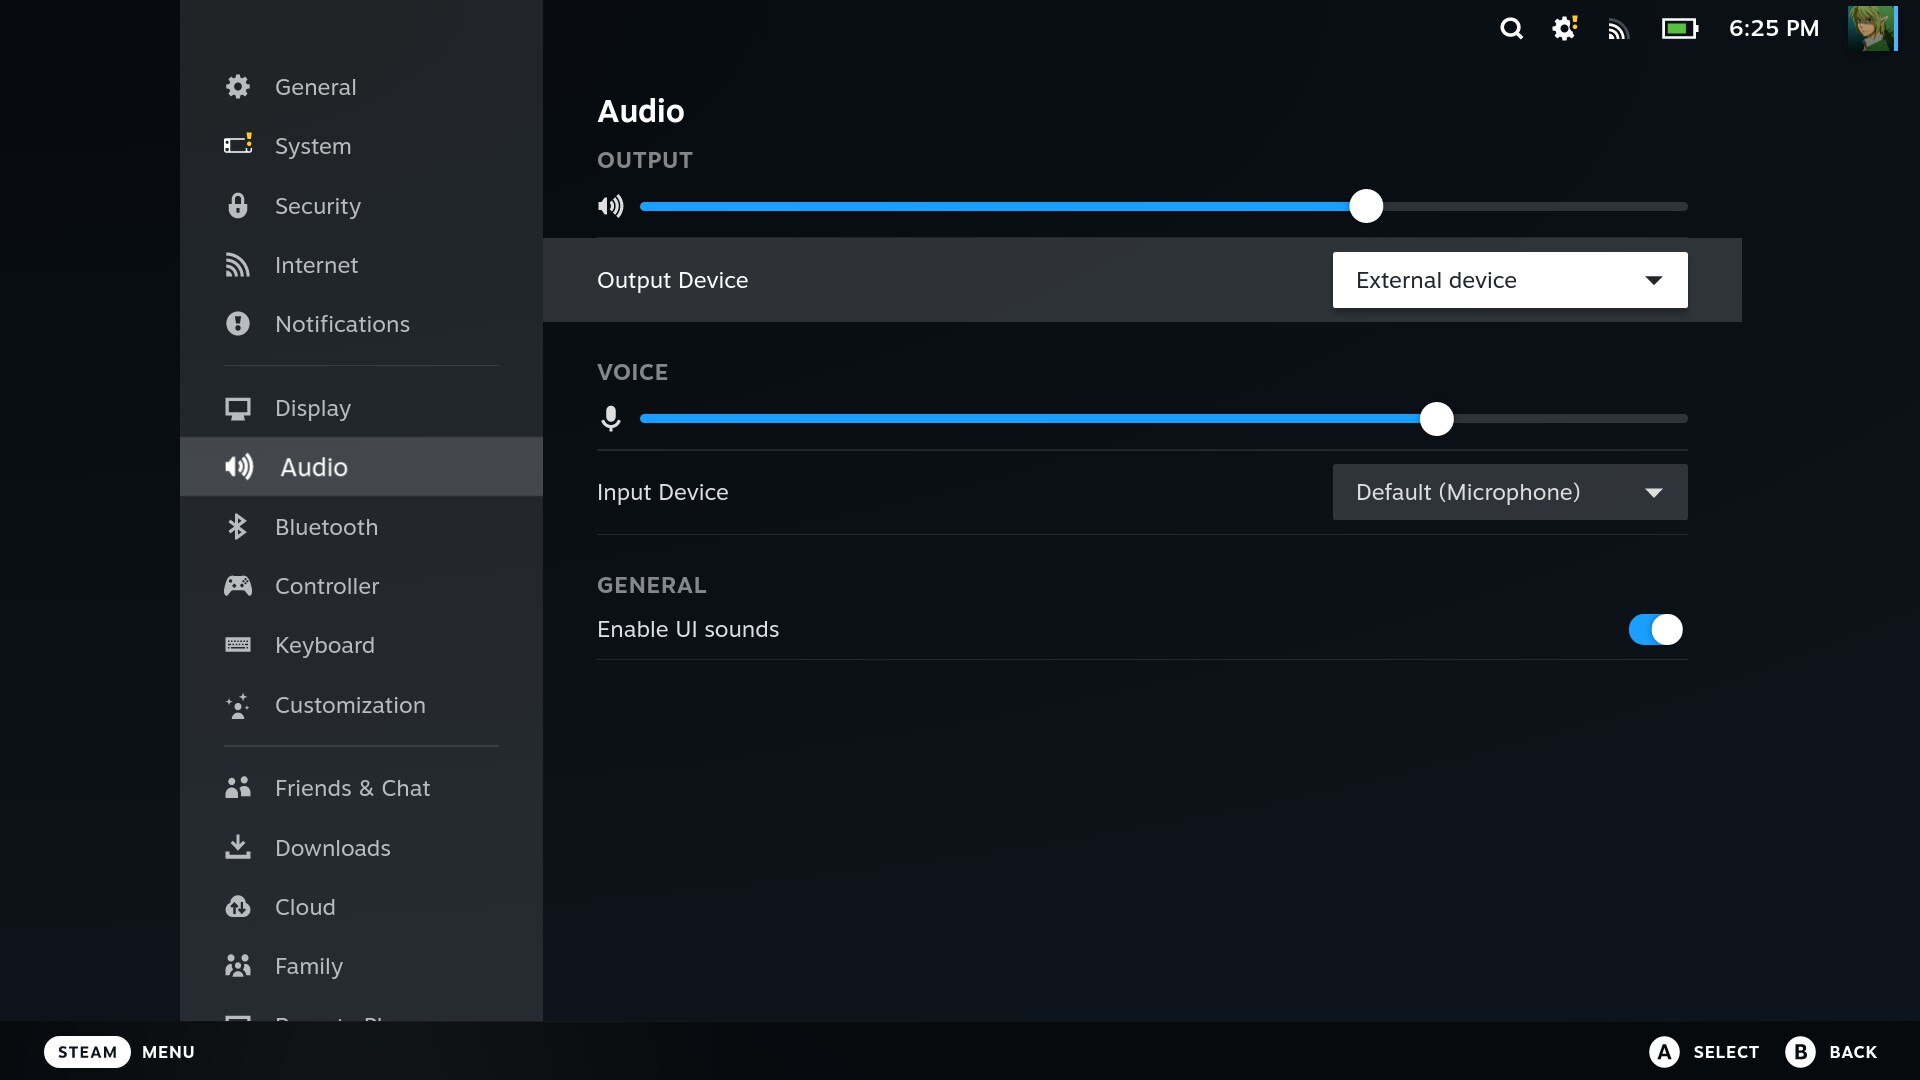
If you experience no sound from the XR Glasses after connecting them to the Steam Deck, press the STEAM button, go to Settings > Audio > Output Device, and select 'External device'.
Troubleshooting for ROG Ally
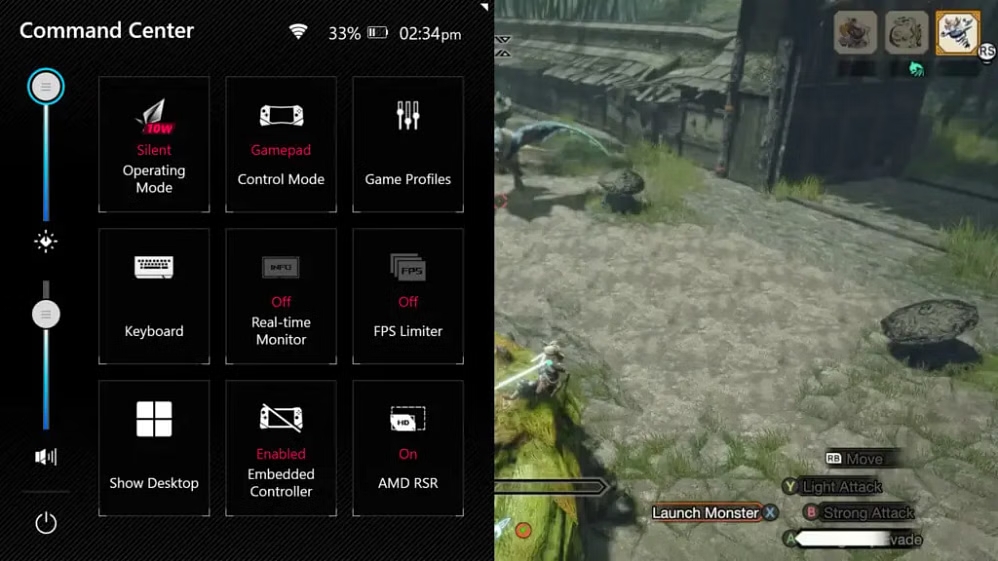
If you are unable to control the gamepad on the ROG Ally after connecting to the XR Glasses, go to Command Center, enable the Embedded Controller and switch the Control Mode to Gamepad.
Insert Nose Pads
When wearing VITURE XR Glasses, the virtual screen should be unobstructed and centered in your line of sight. Try nose pads sizes 1, 2, 3, and 4 (or no nose pads at all) to find the best fit.
If none of the four nose pads fit perfectly, gently bend or spread size #4's stems to find the fit that allows you to see the full display. Refer to this video for instructions.
To remove nose pads:
To install the nose pads:
For a visual demonstration, watch this video.
Adjust Rotary Knobs
VITURE XR Glasses have built-in support for adjusting the virtual image up to -5.0D (500 degrees) for users with myopia (nearsightedness).
Adjust the rotary knobs on the top of your XR Glasses until the image is sharp and clear.
For a visual demonstration, watch this video.
For users with severe astigmatism or myopia prescriptions of -6.0D and beyond, the Prescription Lens Frame allows you to attach your own prescription lenses to VITURE XR Glasses and experience the same immersive virtual entertainment as everyone else.
See also: Precription Lens Frame
Attach Anti-clip Hair Cover
Slide the anti-clip hair cover onto the end of the right temple to prevent hair from getting caught in the magnetic port.