Accessories
VITURE x 8BitDo Ultimate C Bluetooth Controller
The latest extension of our XR ecosystem, the VITURE x 8BitDo Ultimate C Bluetooth Controller is an out-of-the-box game-changer for Nintendo Switch players, VITURE Neckband users, and gamers who play on mobile devices.
Capable of both wired and Bluetooth connectivity, this limited-edition collab design incorporates our classic black and orange colors in a smokey translucent body reminiscent of classic Game Boy shells, with comfortably familiar contours and a button layout inspired by the original Xbox controller.
With 6-axis gyro motion controls, responsive rumble, and enhanced digital triggers engineered for precision, the VITURE x 8BitDo Ultimate C Bluetooth Controller rivals the Nintendo Switch Pro Controller at every point, making it the ideal grab for both solo and co-op play. We've even thrown in anti-interference shielding so your input won't be affected by other wireless devices, up to 16 hours of battery life to keep you in the game (480mAh), and wake-on-shake to get you logged on faster.
It's the ultimate addition to your XR arsenal if you're a gamer who likes a competitive edge in every session!
How to Use

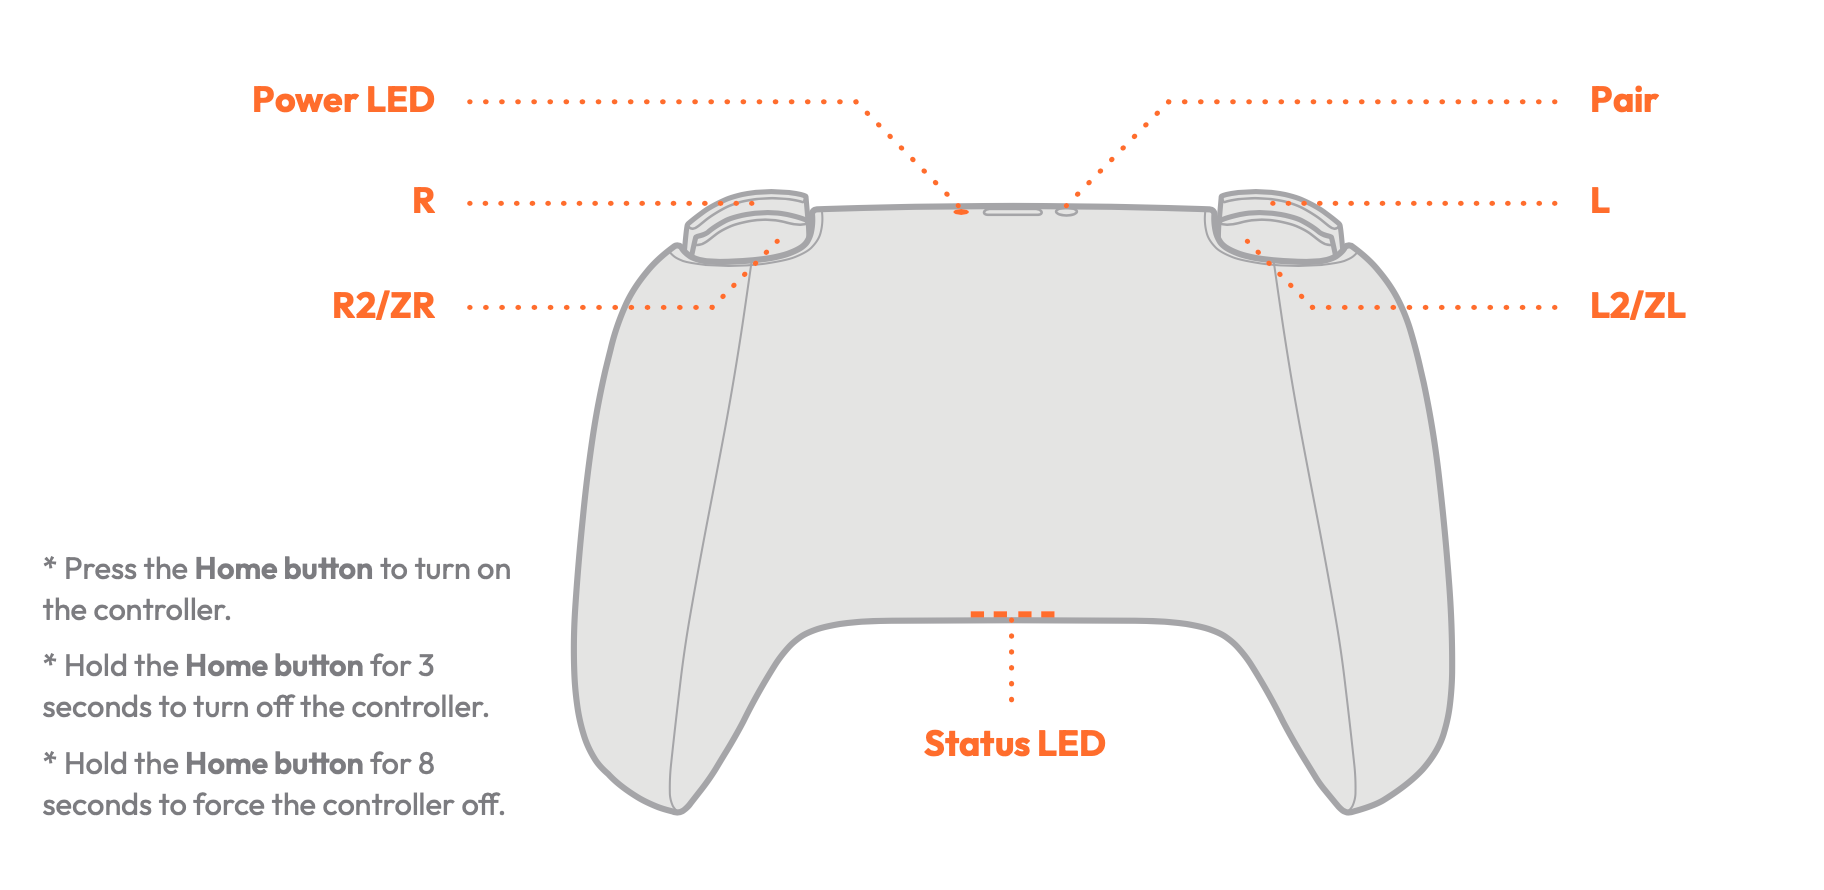
Entering Pairing Mode:

Pairing With VITURE Neckband
Bluetooth Connection
Wired Connection
Pairing With Nintendo Switch
Bluetooth Connection
Wired Connection
Connect the controller to the Switch via a USB cable and wait until the controller is recognized by the system to play.
About Button Mapping
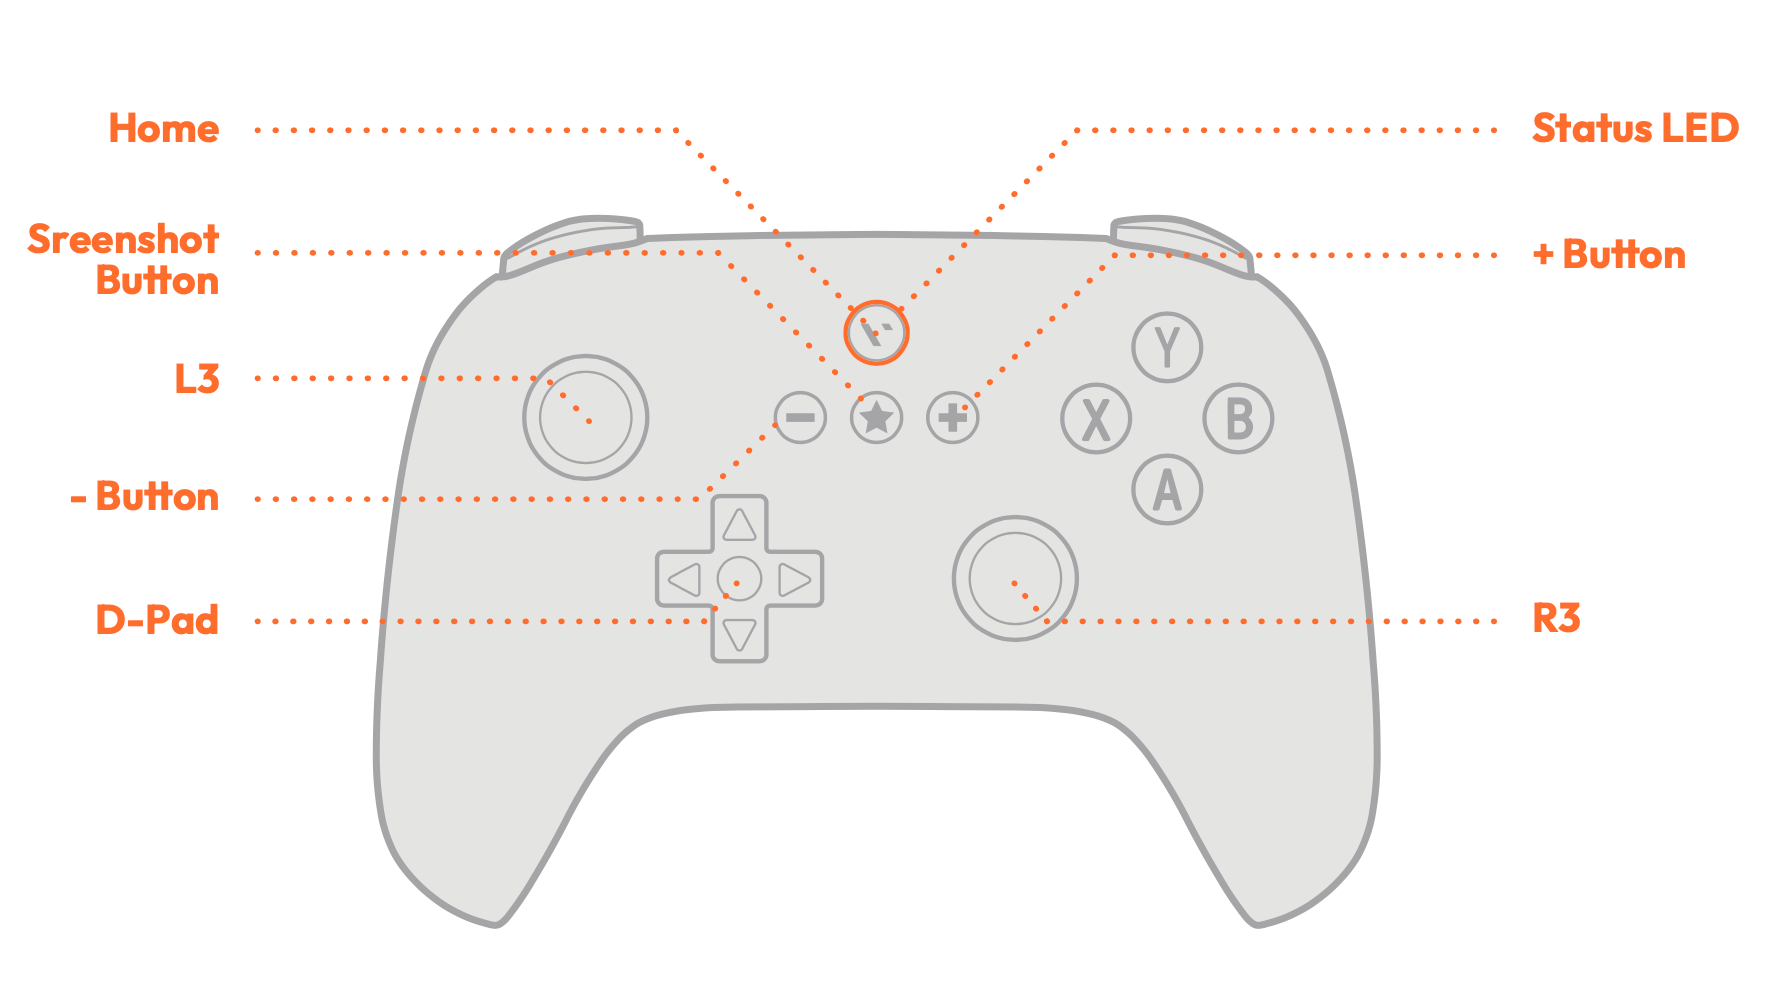
While this controller is recognized as a Pro Controller, the layout of the right-side buttons is different from the Joy-Con.
Currently, the controller does not support global button mapping modification, which usually requires firmware modification to complete. Our VITURE x 8BitDo Limited-edition controller is manufactured with an "Xbox layout" (for better navigation for the Neckband) while the firmware/driver is for a Switch layout. You will probably need to remap the controller button layout before gaming.
If you want to adjust the button mapping on the Switch, please refer to these articles:
How to Change the Button Mapping on Nintendo Switch Controllers
How to Remap Buttons on a Nintendo Switch Joy-Con
Battery
16 hours of play time with a 480 mAh built-in lithium battery pack, rechargeable with 2 hours charging time.
| Status | LED Indicator |
|---|---|
| Low Battery | Red LED blinks |
| Charging | Red LED solid |
| Full Charged | Red LED turns off |
Neckband Charging Case
Hassle-free charging for hours of extra playtime — the Neckband Charging Case's 7,800mAh power bank keeps your Neckband charged while you're not using it, with enough juice for up to two full charges between plug-ins!
Just put your Neckband in, throw it in your bag, and it will be fully charged the next time you need it.
Get the Neckband Charging Case
| Color | Black, Blue |
|---|---|
| Dimensions | 200.0 × 166.0 × 69.0 (mm) |
| Weight | 494g |
| Capacity | 7,660mAh |
| USB-C Input | 18W (5V~2.5A, 9V~2A, 12V~1.5A) |
| USB-C Output | 18W (5V~2.5A, 9V~2A, 12V~1.5A) |
| Magnetic Connector Output | 18W (5V~1.5A, 9V~1.5A) |
The Neckband will be fully charged in 2 hours using the Charging Case, and the Charging Case can fully charge the Neckband for over 2 times.
To use the Neckband Charging Case to charge your Neckband, follow these steps:
You can read a probable battery percentage remaining by the LED indicator on the Neckband Charging Case.
| LED | Battery percentage |
|---|---|
| 4 lights | 76~100% |
| 3 lights | 51~75% |
| 2 lights | 26~50% |
| 1 light | 1~25% |
To charge the Neckband Charging Case, do any of the following:
It is safe to charge the Neckband and the Charging Case at the same time.
See also: Charging Your Neckband