Apps
Install and Uninstall Apps
The Pro Neckband comes preloaded with Google Play Store, providing access to a vast library of apps.
Install Apps
Uninstall Apps
To uninstall apps you no longer need:
Note: Pre-installed system apps cannot be uninstalled, but some may allow disabling to free up space.
Ghost Party
Celebrate Halloween with Ghost Party, an exclusive 6DoF XR game designed for VITURE Luma Ultra XR Glasses! In this adventure, use pumpkin bombs to blast mischievous ghosts while moving around the game board to find the perfect attack angle.
Important: Ghost Party is a 6DoF XR App, currently supported only on Luma Ultra XR Glasses.
How to Play
Switch Explosive: Flip your palm upward, then pinch to change the type of explosive; Hit the Target: Pinch with one hand to draw the slingshot, pull back, aim, then release to fire!
Ghost Party Capture (An iOS App for Third-Person Recording)
Want to share your Halloween moments in mixed reality? Use Ghost Party Capture to record your gameplay from a third-person view!
Setup Steps

Tips: You can cover each camera lens one by one to confirm which camera is in use. Generally: iPhone Pro / Pro Max: bottom-left lens; iPhone 13–15 & Plus models: bottom-right lens; iPhone 16–17 : top camera.
Pro Tips
Final Result
Once your recording is complete, share your Ghost Party moments with your friends!
Remote Play: PXPlay & XBXPlay
We are honored to announce that VITURE is now the official partner of PXPlay and XBXPlay!
PXPlay and XBXPlay are leading streaming apps, giving you the freedom to remotely play your favorite games from PlayStation 5/4, Xbox Series X|S, and Xbox One.
Typically priced at $6.49 (plus tax) on the Google Play Store, but both PXPlay and XBXPlay are now FREE for Neckband owners!
Note: For optimal gameplay, switch to In-Game Controls by pressing and holding L1 + R1 when using a Bluetooth game controller. Learn more at Game Controllers.
What's New in PXPlay and XBXPlay
The latest updates to PXPlay and XBXPlay introduce several enhancements.
PXPlay version 6.5.0:
XBXPlay version 1.8.0:
Now available on the Neckband.
Setup PXPlay & XBXPlay
To make setup as smooth as possible, have the following items available:
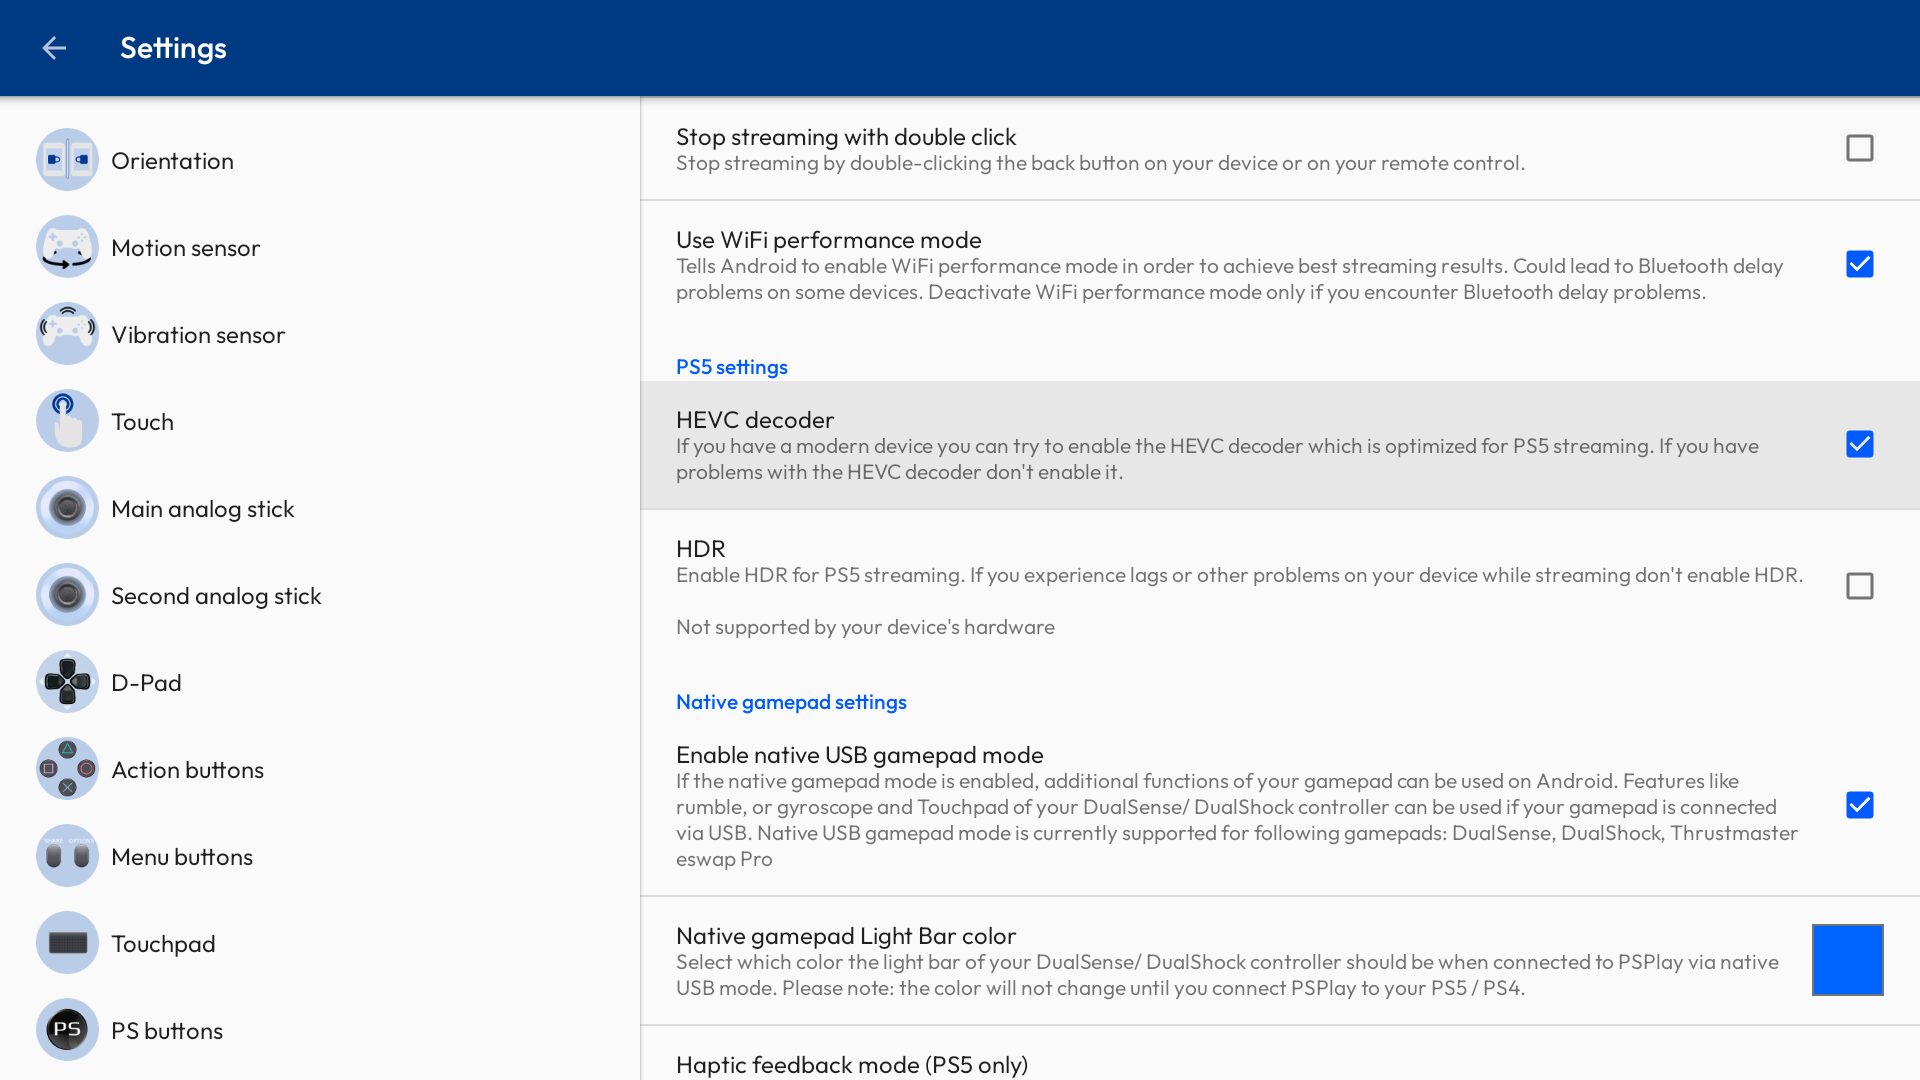
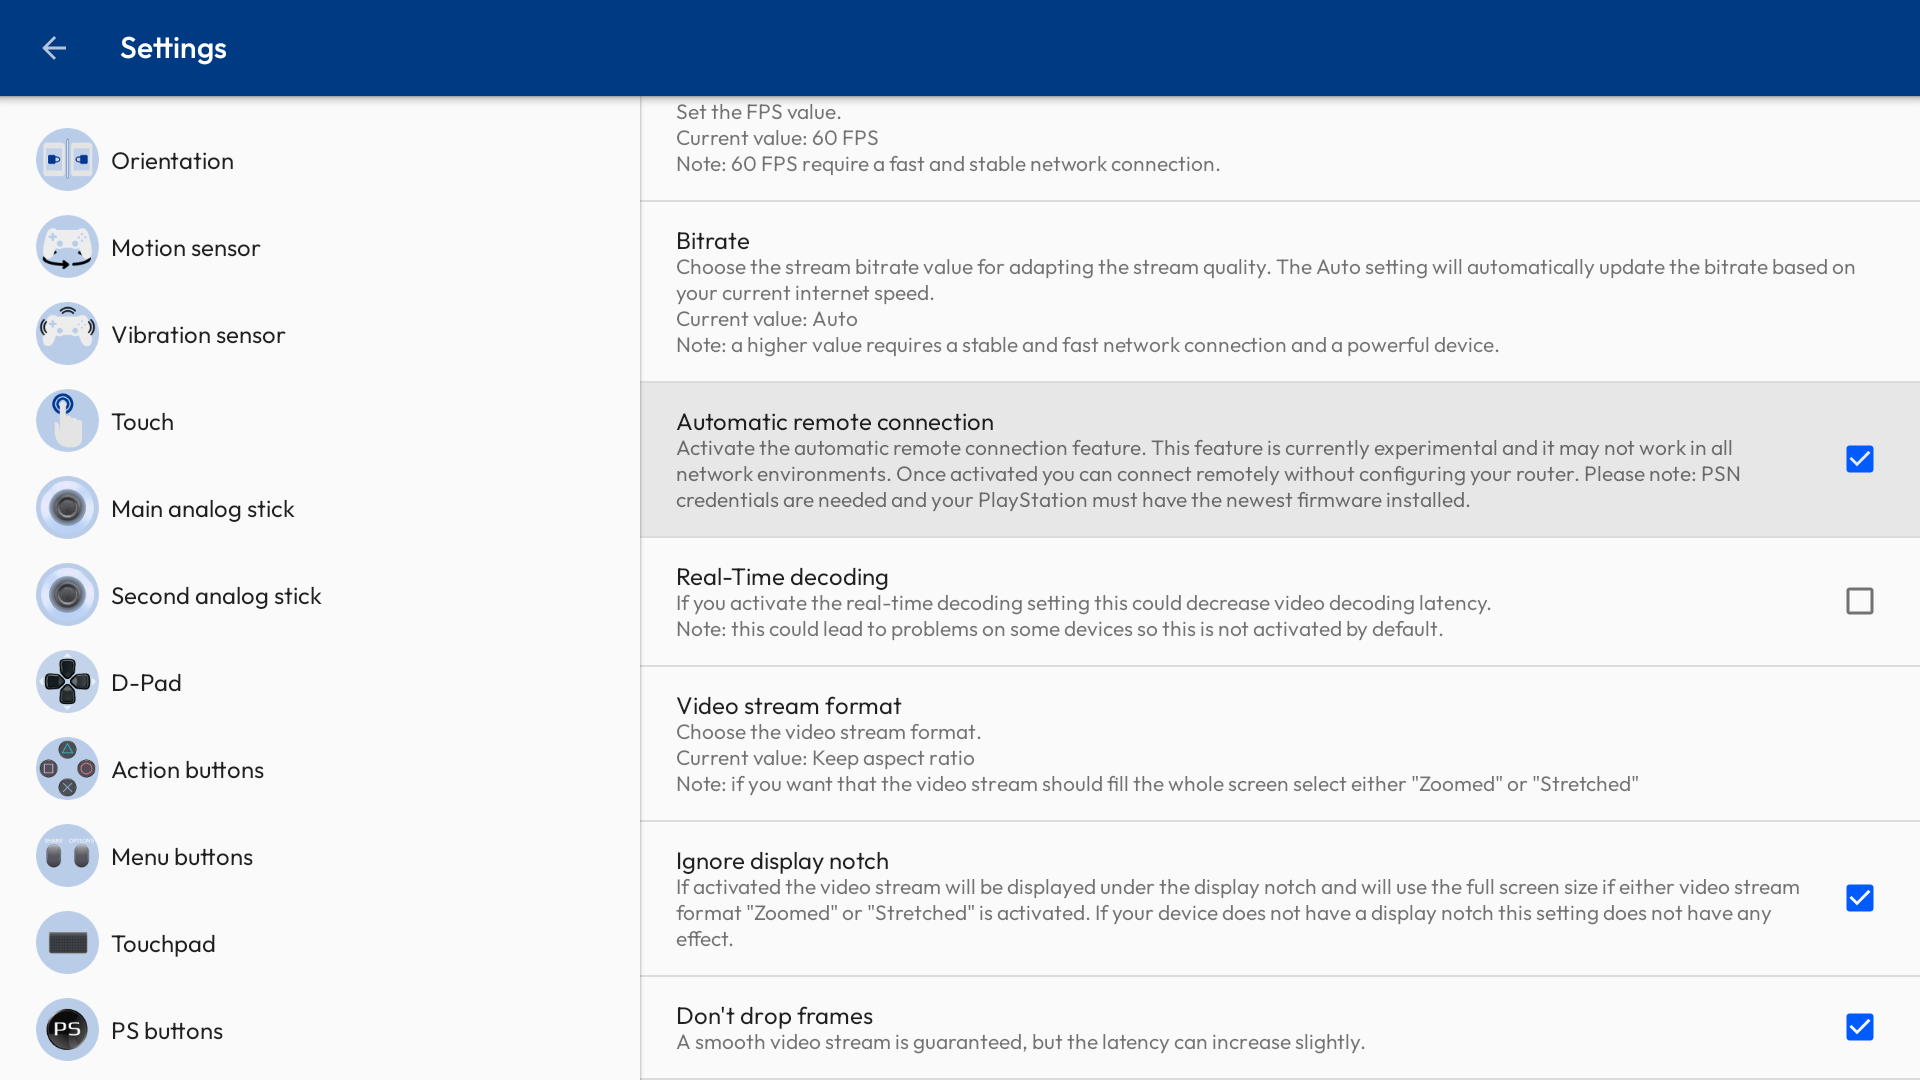
Once you've set up the app, go to the settings on the top left of either app and ensure the following are set:
Important Note: When playing your PS5 console on a local network, use the gamepad connected to your Neckband. Avoid using the controller directly connected to your PS5 console. Any activity on the console can interrupt and end the remote play session.
For more information, please visit PXPlay | Help or XBXPlay | Help
See also: Updating Your Neckband
Enable Haptic Feedback for DualSense Controller
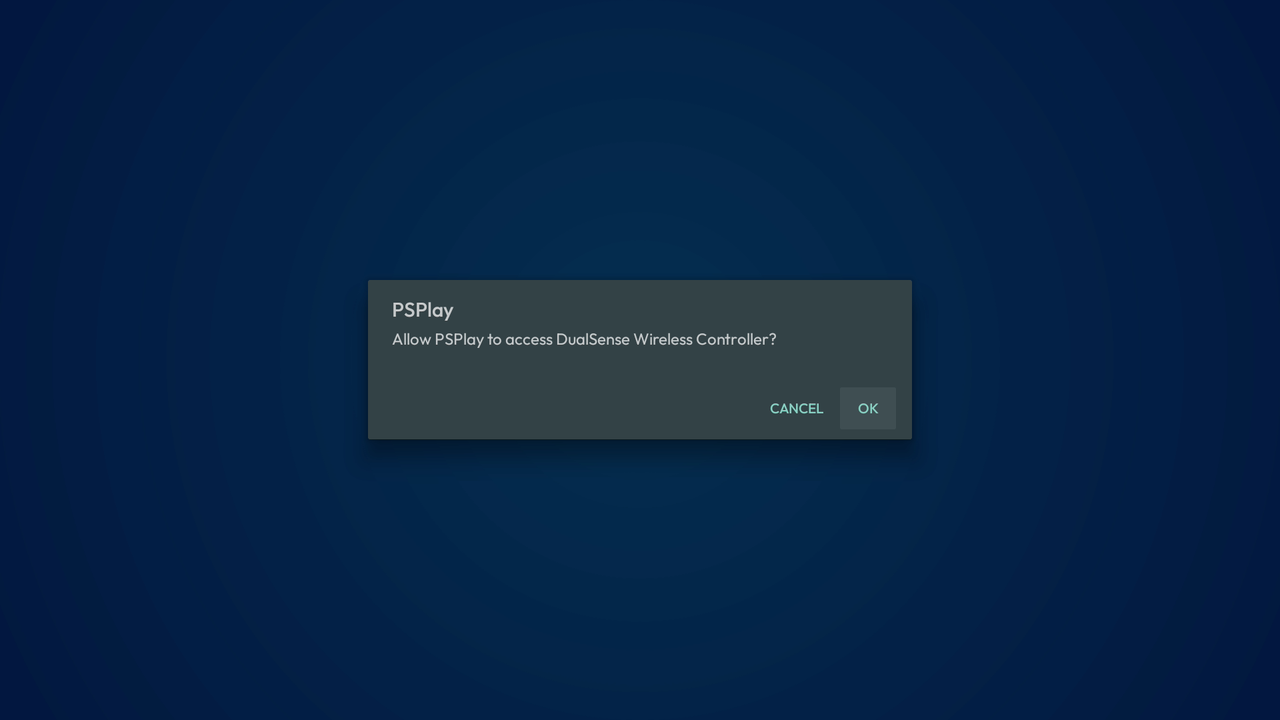
While using a DualSense controller connected via USB-C for remote play from your PS5, you can enable haptic feedback on the controller. Follow these steps:
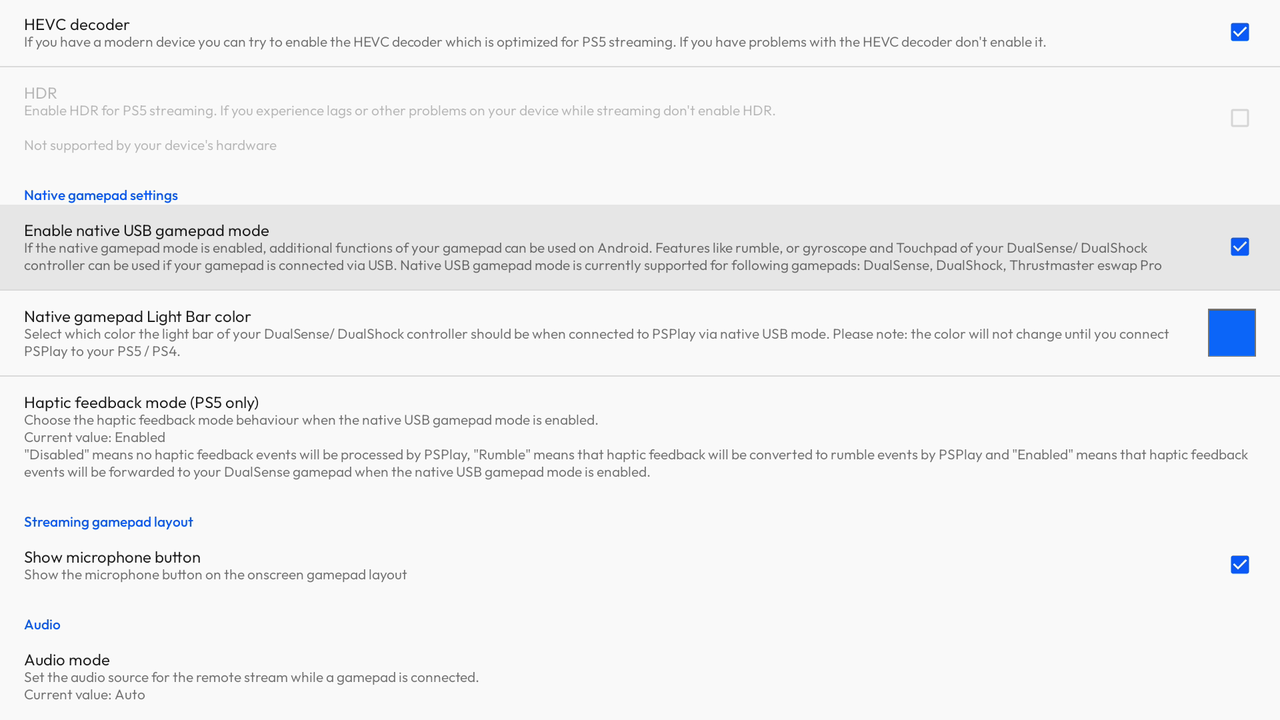
Connect to your console and start streaming your game with haptic feedback!
If you're still not experiencing haptic feedback after following these steps, ensure your DualSense controller isn't connected to other devices via Bluetooth, including your PS5 and Neckband.
Use Microphone During Remote Play
During remote play, press the OK button on your Neckband to toggle the microphone on or off. PXPlay will request microphone access the first time you enable it.
The microphone's status icon is located in the bottom right corner of the screen. When you turn the microphone on or off, the icon will change to reflect the new status. Your PS5 console will also display a notification about the microphone status.
If the microphone status icon is missing or you can't enable the microphone:
The microphone status icon should now appear on the screen.
3D Player
VITURE XR Glasses feature native full SBS 3D video support, and the Neckband offers enhanced 3D features with auto-detection and half SBS support. It's all in the 3D Player app.
Compatibility
Video & Picture Decoder
3D Player now supports:
Audio Decoder
3D Player now supports MP3, AAC, WMA, RM, FLAC, and programmable with 7.1/5.1 down-mixing.
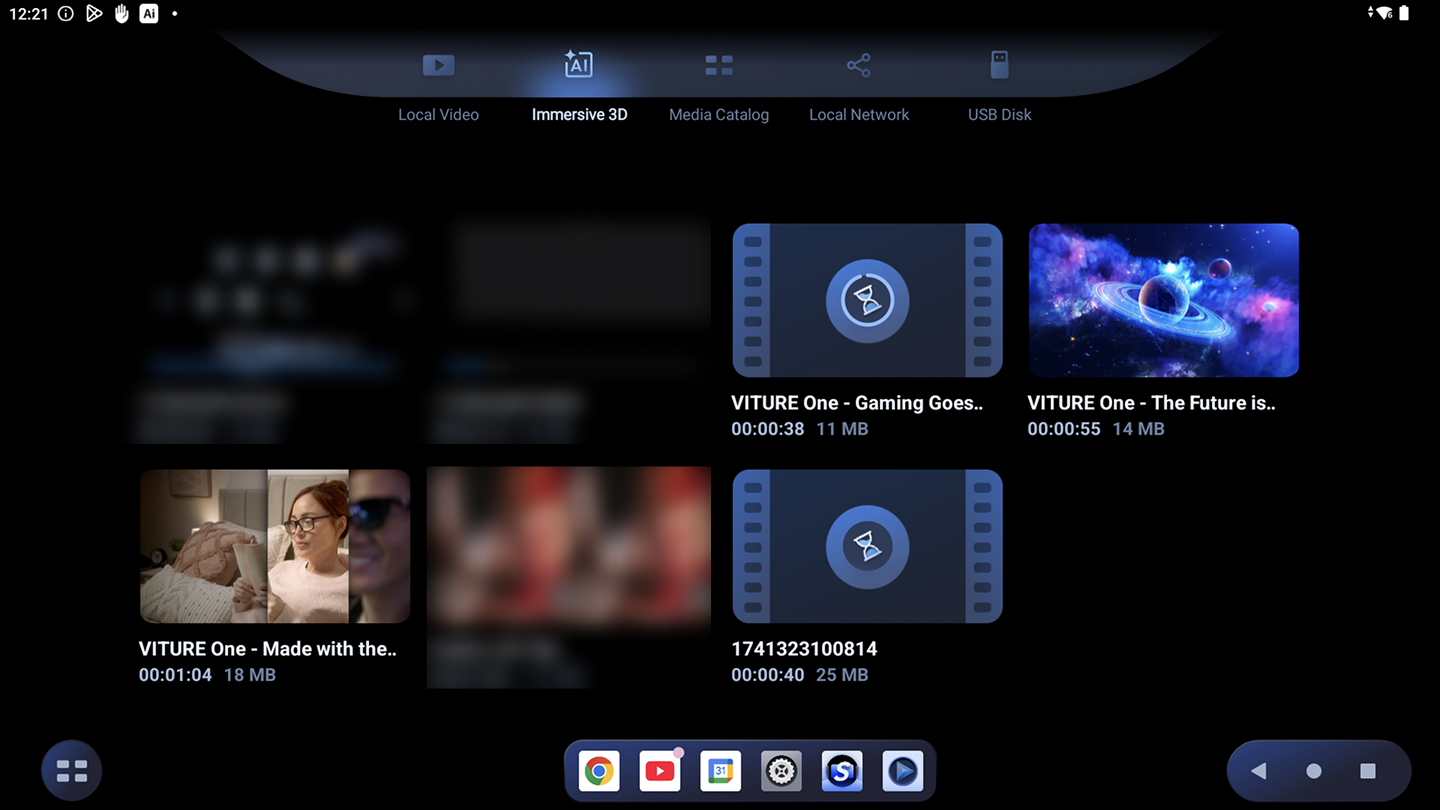
View & Play Videos
In the 3D Player app, the first tab includes videos stored locally on your Neckband. All videos are listed in a gallery scene.
Play Videos
Navigate to the video that you want to play, then press the OK button on the Neckband to start playing.
Control Playback
| Control | Description |
|---|---|
| Playback Mode | - 2D: Normal. - 3D Double Screen (Left/Right): For full or half 3D SBS videos. - 3D Double Screen (Up/Down): For full or half 3D OU videos. - VR 360°: For immersive 360° VR videos. |
| Screen Ratio | - Full Screen: Play in 16:9 aspect ratio. - Proportional Cutting: Play in the video's original aspect ratio. |
| Playlist | View the queue and choose to start playing another video. |
| Playback Order | - Sequential Playback: Play the videos in the queue and go back to the video list. - Play Random: Turn on shuffle. - Loop Playback: Repeat a playlist. - Single Circulation: Repeat a single video. - Single Playback: Play a single video and go back to the video list. |
| Subtitle | Show and select subtitles in the video (not available for all videos). |
| Audio Track | Show and select all audio tracks in the video. |
| Play/Pause | Press the OK button to play or pause. |
| Playhead | To fast-forward or rewind, press and hold the left or right on the D-pad. |
| Restart | Watch from the beginning. |
Use External Subtitle Files
3D Player supports many subtitle formats including SRT (.srt), ASS (.ass), SUP (.sup). Subtitle files need to be named the same as the media file, and put the subtitle files and media files in the same folder.
For example:
The name of the media is Avatar (2009).mkv.
Name your subtitle files as Avatar (2009).srt, or Avatar (2009).ass.
Immersive 3D
Immersive 3D is an AI-powered feature that transforms 2D videos into stunning 3D. Here’s how you can experience it on the Pro Neckband:
Note: Immersive 3D on the Pro Neckband is currently in preview mode, allowing conversion of the first minute of a video. The full real-time version will be available in a future update.

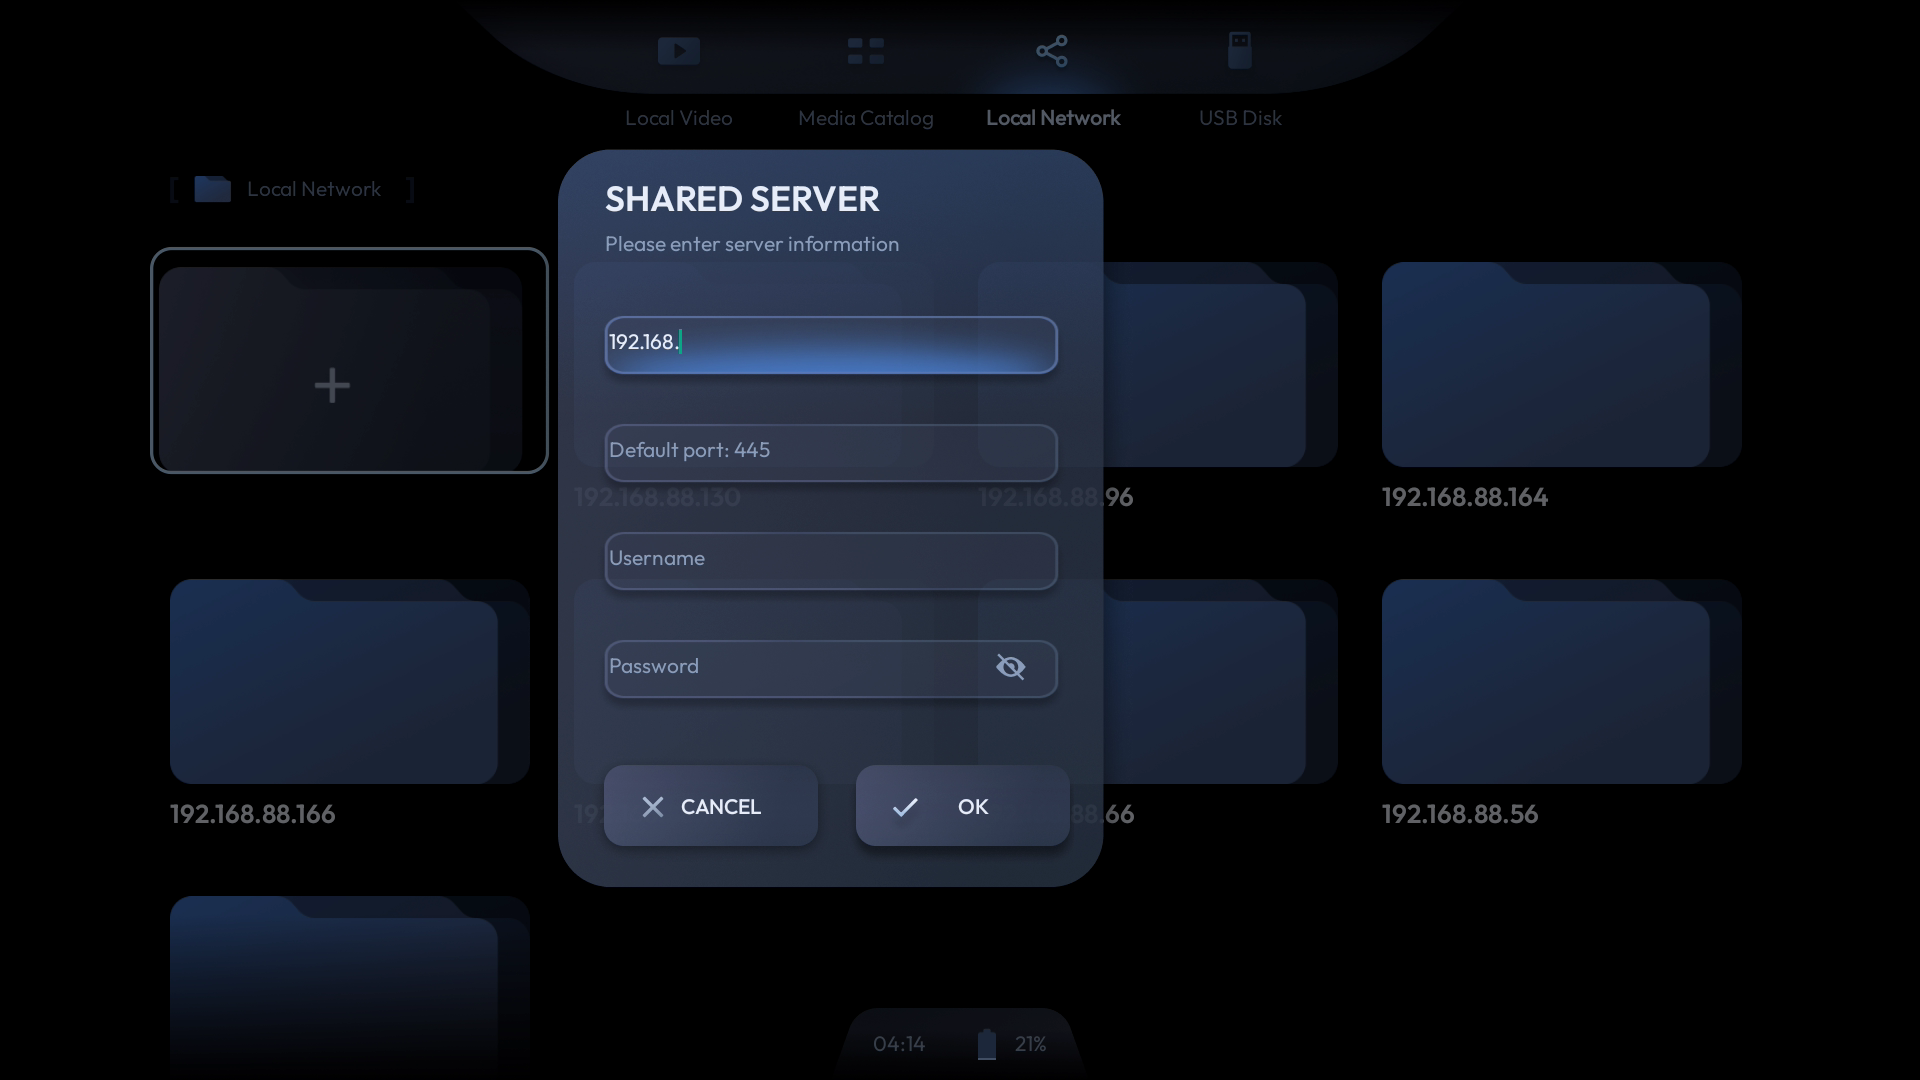
Local SMB Shared
The Local Network tab allows you to access the storage of devices on your local network. This feature enables you to view videos and movies from your home NAS or computer without having to copy large files to the Neckband.
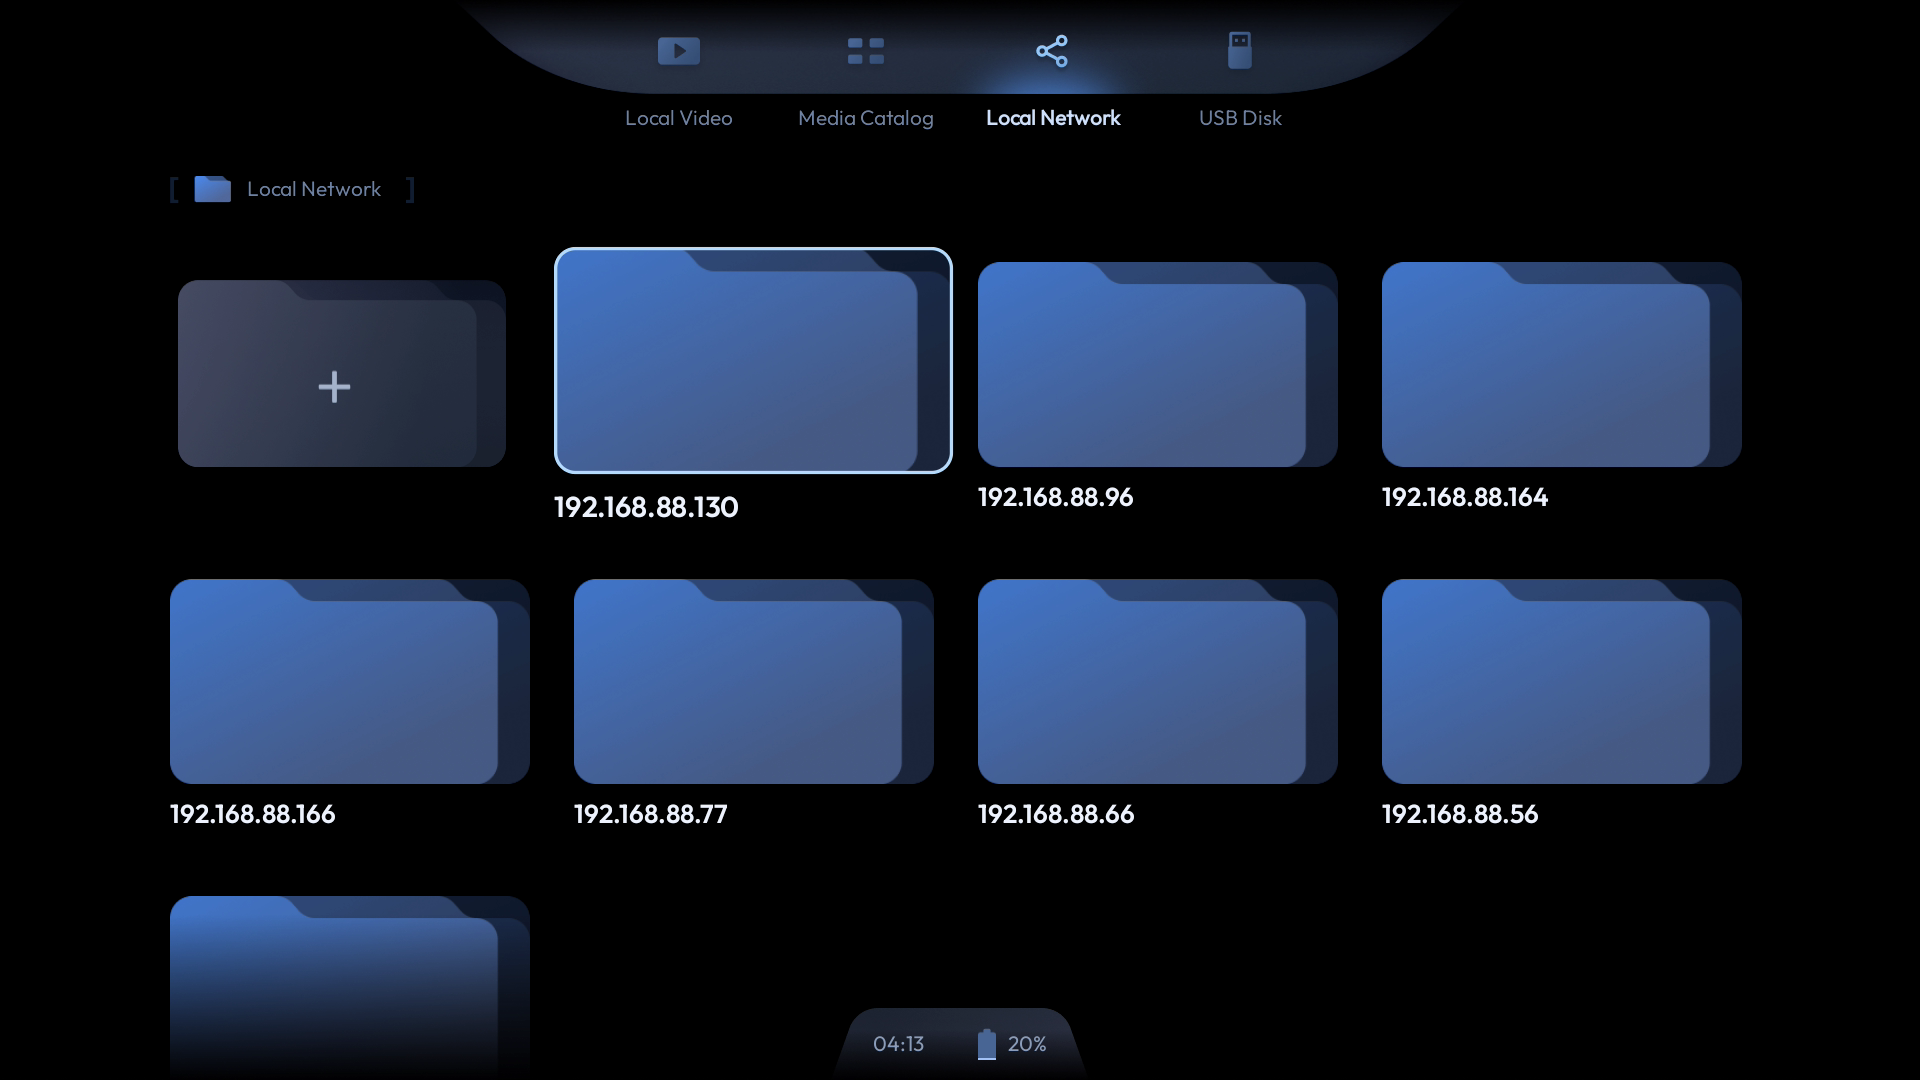
Steps to Access Local Device Storage:
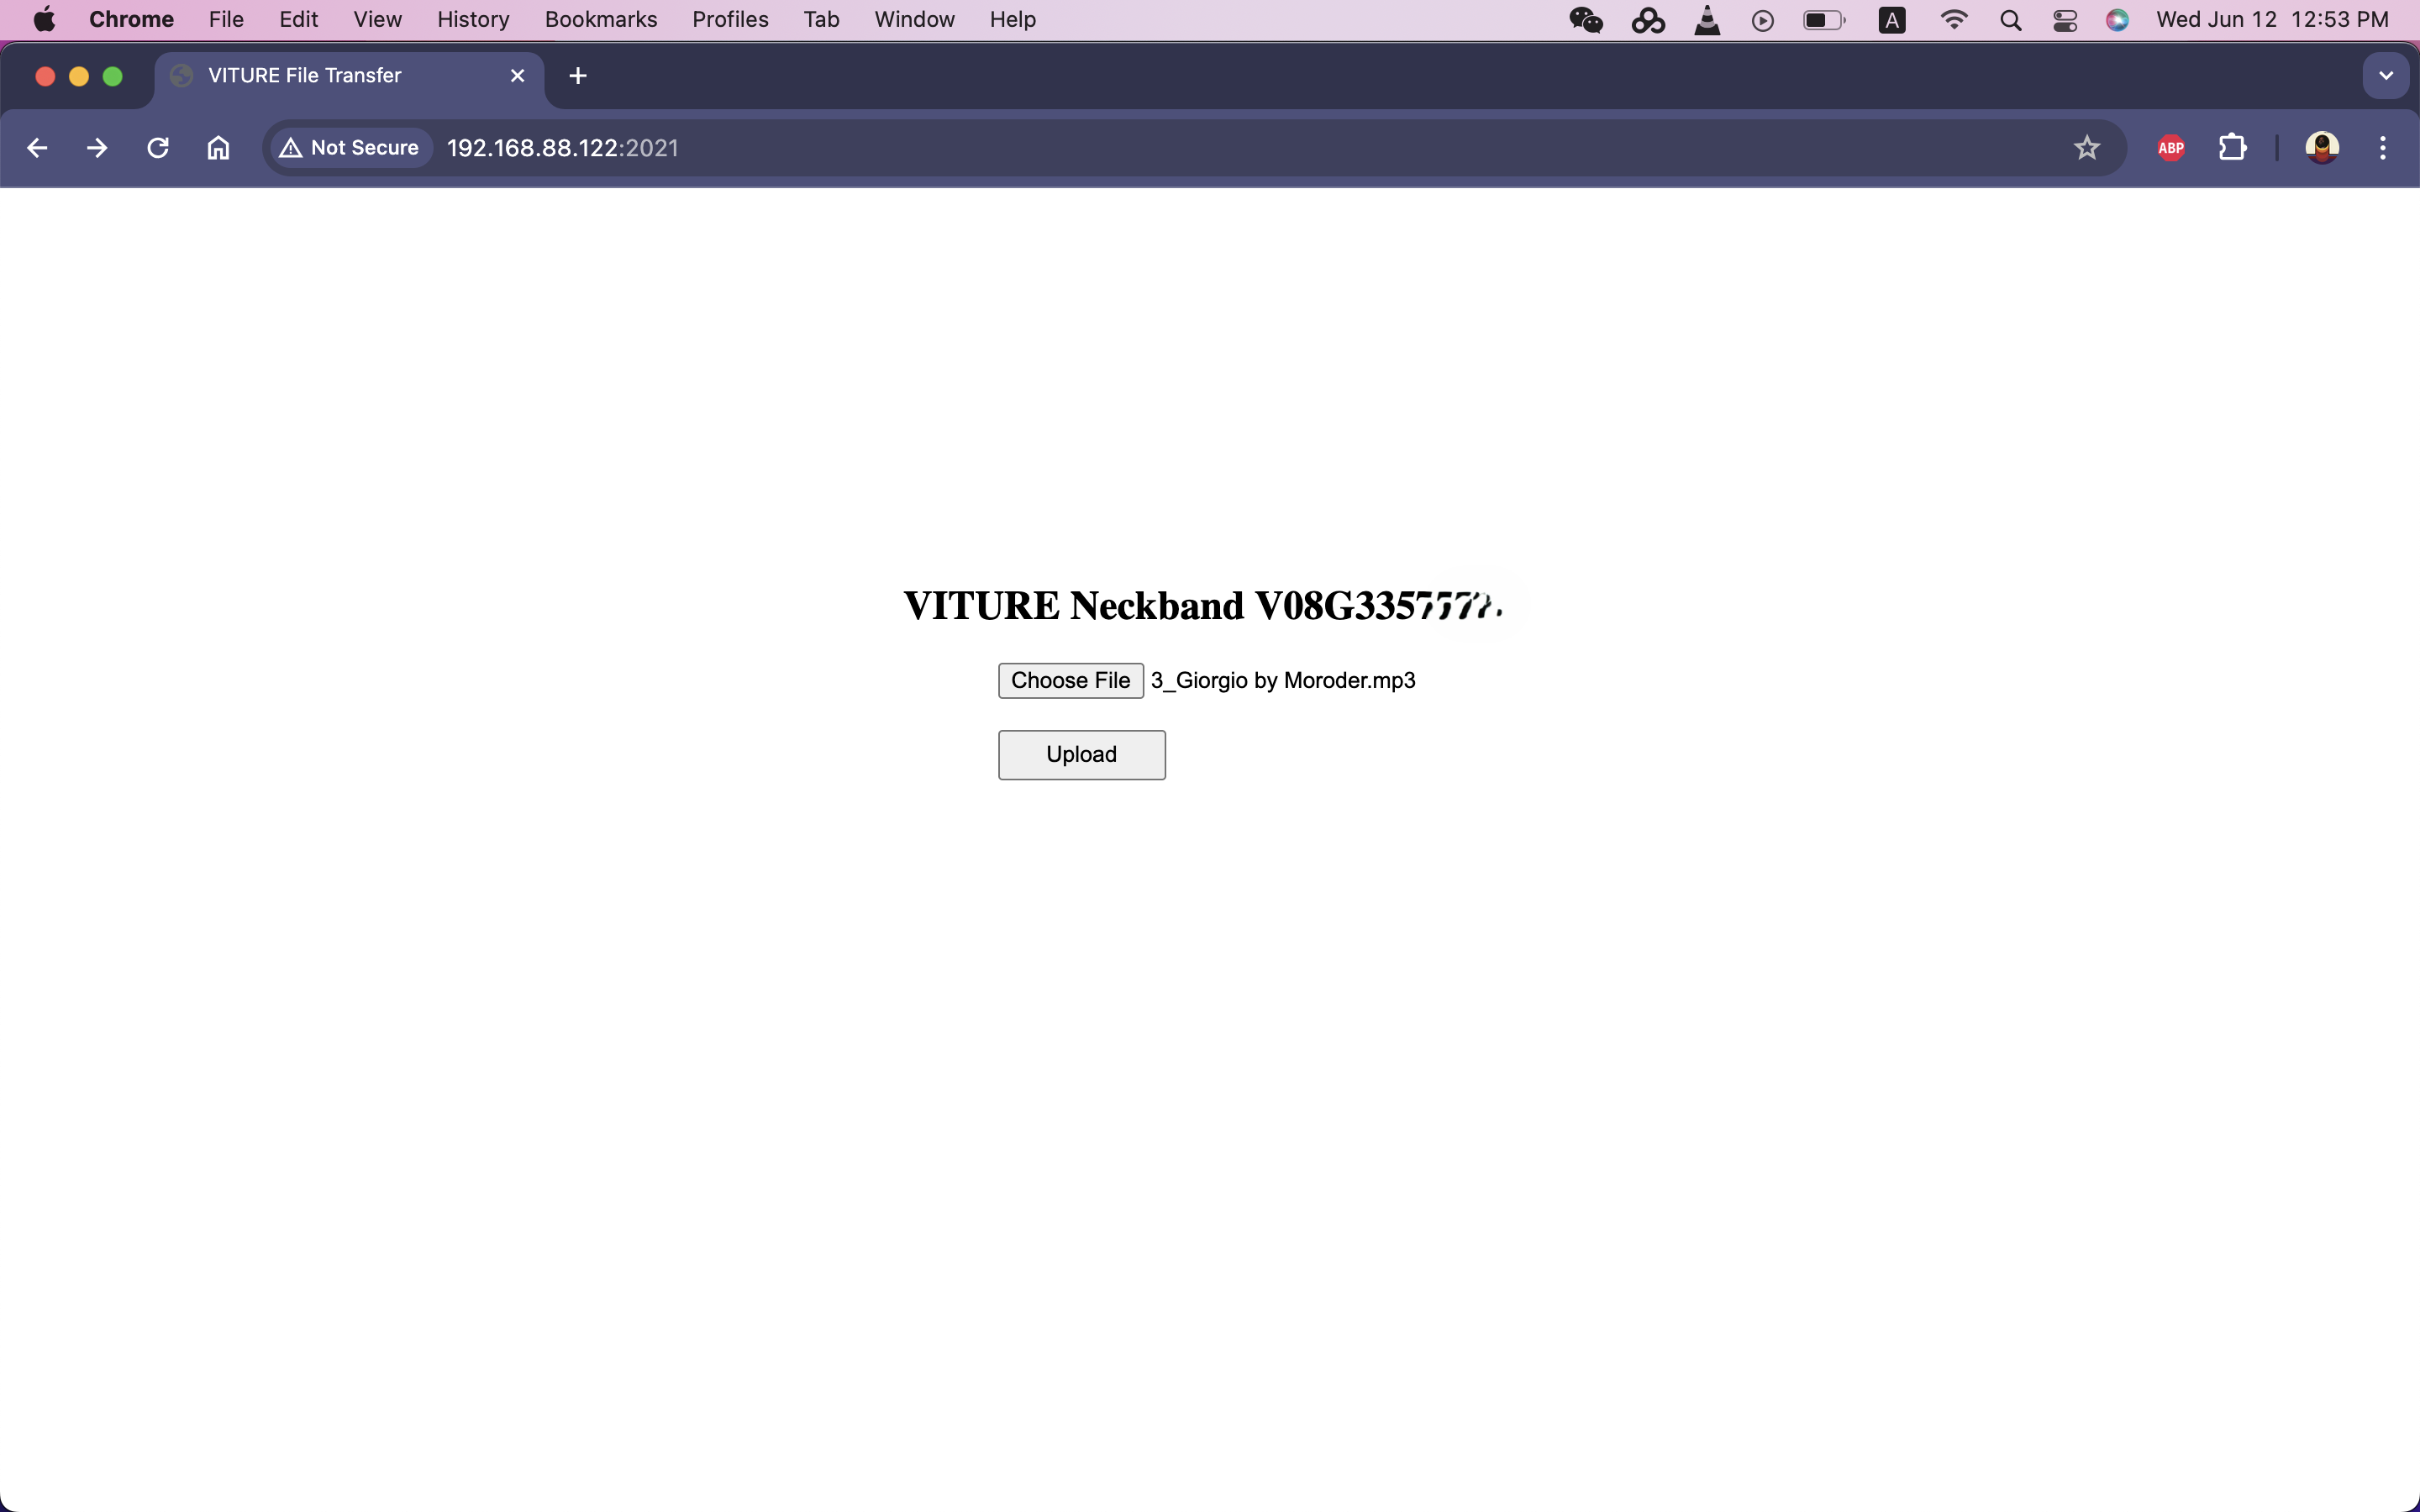
Transfer Files to the Neckband via Web
In addition to transferring files to the Neckband using a data cable, you can also transfer files via a web page within the same local area network.
Follow these steps to transfer files to the Neckband:
Vizard
Introducing Vizard
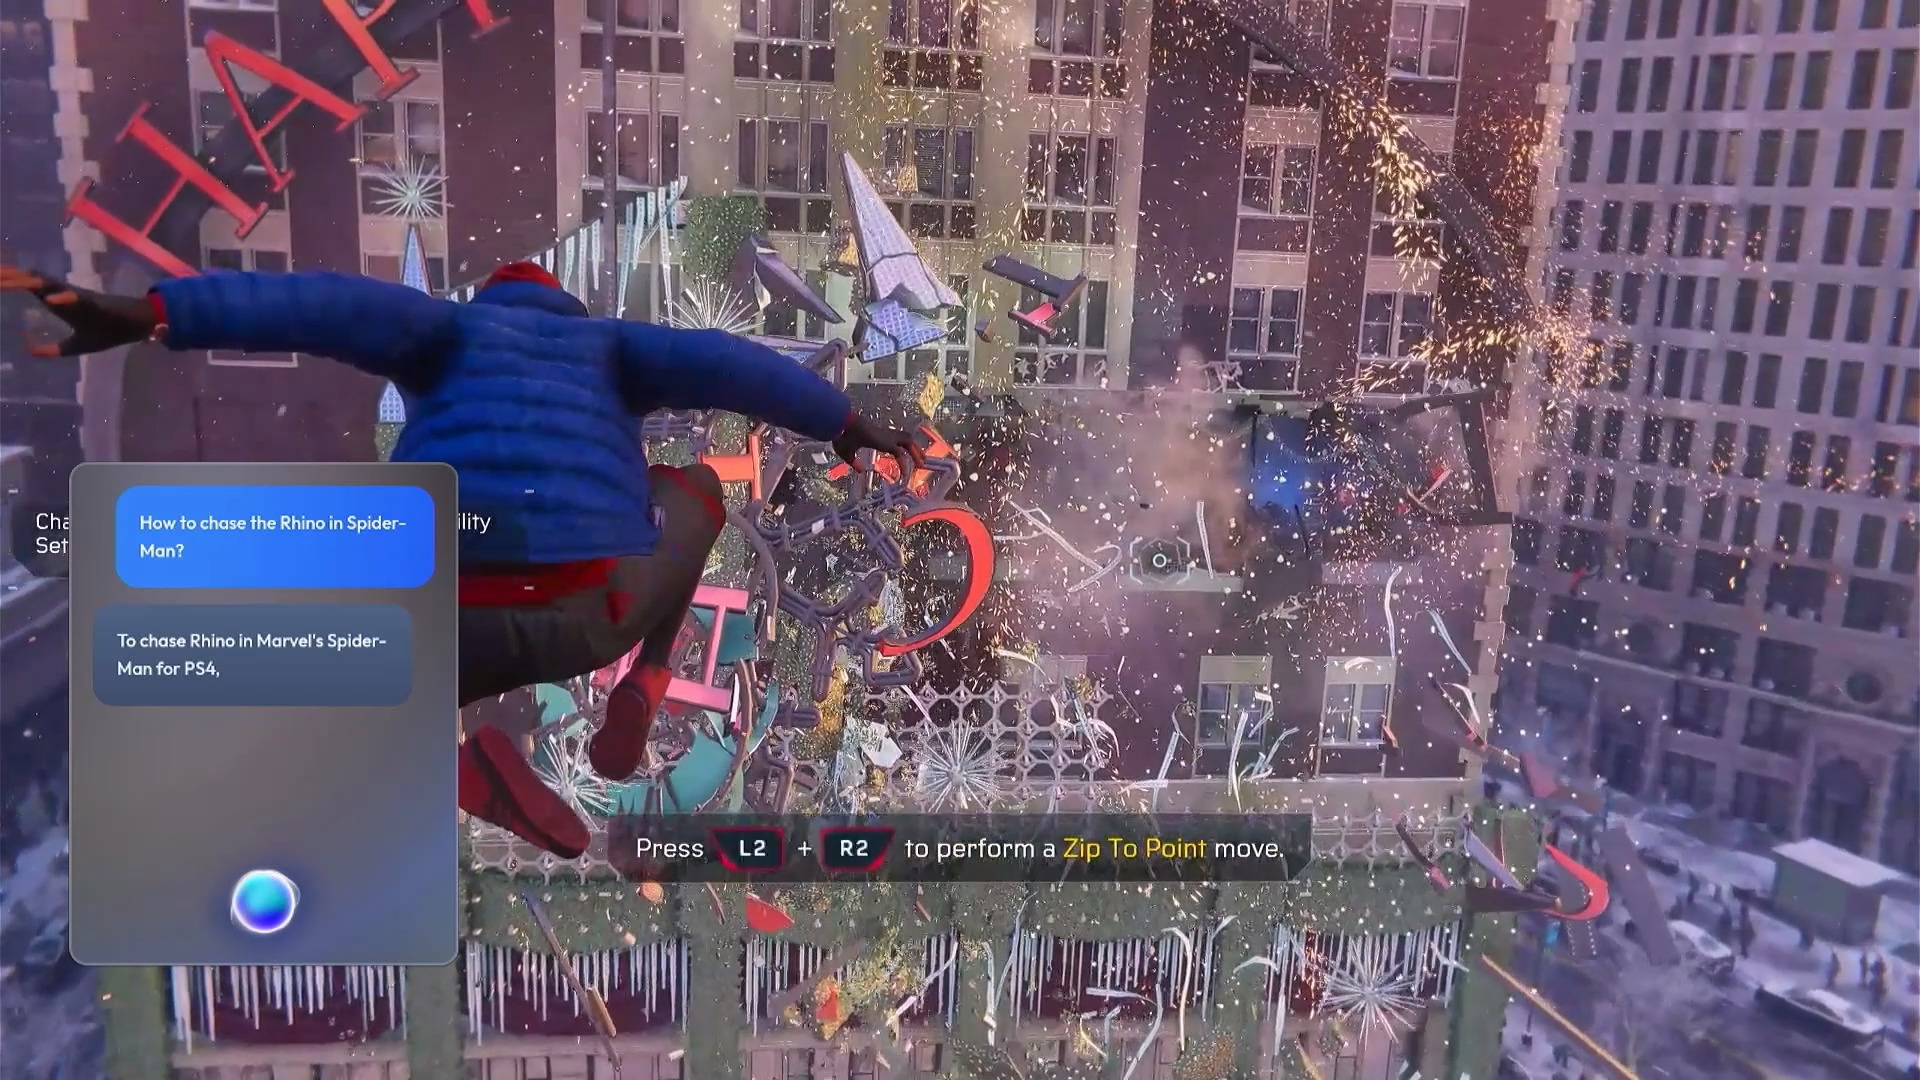
Vizard is the voice assistant for the VITURE Pro Neckband. It enables hands-free control of the system using voice commands and functions as an AI-powered game assistant that provides game guides and instructions while you’re cloud gaming or playing remotely.
To activate Vizard, simply press and hold the Settings button on the Neckband or say, "Hey Vizard," and then speak your command or question.
With Vizard, you can perform system tasks such as "increase brightness," "adjust volume," "open an app," or "close an app." Vizard is continuously updated to support an expanding range of voice commands and functions.
Vizard supports multi-turn conversations, allowing you to engage in natural dialogues seamlessly. Additionally, it incorporates the capabilities of a large language model, meaning you can interact with Vizard conversationally.
Please note that Vizard currently cannot provide local or time-sensitive information, such as weather updates, the current time, or nearby restaurants.
Where to Use Vizard
Vizard utilizes natural language processing to recognize and execute commands such as:
For gaming assistance, Vizard is most effective with single-player games on consoles or PC platforms. It is not recommended for real-time online multiplayer games or games requiring high precision, such as first-person shooters or MOBAs like Dota 2. Games played with a gamepad are preferred over those requiring a keyboard and mouse.
We highly recommend using Vizard in the following scenarios:
How to Use Vizard
Wake Vizard Up
Say "Hey Vizard" to activate it hands-free.
Talk to Vizard
Once Vizard is active, speak your question or command. Vizard will process your input, think for a moment, and respond with an appropriate answer or action.
Continue the Conversation
Vizard supports multi-turn conversations. While only the current dialogue appears on the screen, Vizard can maintain context for the ongoing interaction, provided you don’t close the assistant.