The Basics: Battery, Charging, and Connectivity Guide
Battery Capacity and Battery Life
The battery capacity indicates how much charge the battery can store. The Pro Neckband has a capacity of 3,280 mAh.
XR Glasses
VITURE Pro
Luma Pro
Luma Ultra
Battery Life
4+ hours
~3 hours
~ 2hours
The battery life depends on the connected glasses and usage scenarios.
Charge Your Neckband
To charge your Neckband:
Connect it to a power outlet using the included USB-C cable and a compatible USB power adapter.
Alternatively, connect the Neckband to your computer with a USB-C cable.
The LED indicator on the Neckband lights up while charging. With a USB-C cable, it typically takes 1.5 hours to fully charge the Neckband.
Check Battery Percentage
You can view the Neckband's remaining battery charge in several ways:
On the Quick Settings: Displayed at the Quick Settings panel.
In the 3D Player app: Battery percentage is also displayed here.
Additionally, you can estimate the battery level via the LED indicator:
Color
Battery Percentage
White
51–100%
Yellow
21–50%
Red
1–20%
The LED is solid when the system is running and pulses while charging.
Connect Bluetooth Accessories
You can pair Bluetooth accessories like keyboards, headphones, speakers, or game controllers with the Neckband. The accessories should be within 33 feet (10 meters) for a stable connection.
To pair a Bluetooth accessory:
Place the accessory in pairing mode.
On the Neckband, go to Settings > Pair new device, and select the accessory name..
The Neckband reconnects to previously paired accessories automatically if they’re powered on. If it doesn’t:
Ensure the accessory isn’t connected to another device.
Navigate to Settings > Saved devices, and manually select the accessory.
Tranfer Files to Your Pro Neckband
Transfer Between Mac and Windows PC
To transfer files between your Pro Neckband and a computer, please note that the USB-C port on the Pro Neckband does not support direct data transfer. Instead, you will need to use a Magnetic Connector to USB-C Adapter.
Follow the steps below:
Connect the magnetic connector of your Pro Neckband to the adapter.
Plug the USB-C end of the adapter into your computer.
On Windows, the device will appear as an external drive under This PC.; On macOS, you must first install a file transfer utility such as MacDroid.
Once recognized, you may transfer files by copying them between your computer and the Neckband as you would with a standard external drive.
Important: During the transfer process, please ensure the Neckband stays powered on to avoid interrupting the transfer.
Transfer Between Flash Drives
The USB-C port on the Pro Neckband supports direct connection to USB flash drives.
To transfer files from a flash drive:
Connect the flash drive to the USB-C port of the Pro Neckband.
Open the 3D Player app on the Neckband to access and view the files stored on the flash drive.
Transfer Files via Web Interface
In addition to using an adapter, files can also be transferred wirelessly to the Pro Neckband via a web interface, provided that both devices are on the same local network.
Please follow these steps:
Ensure both the Pro Neckband and your computer are connected to the same Wi-Fi network..
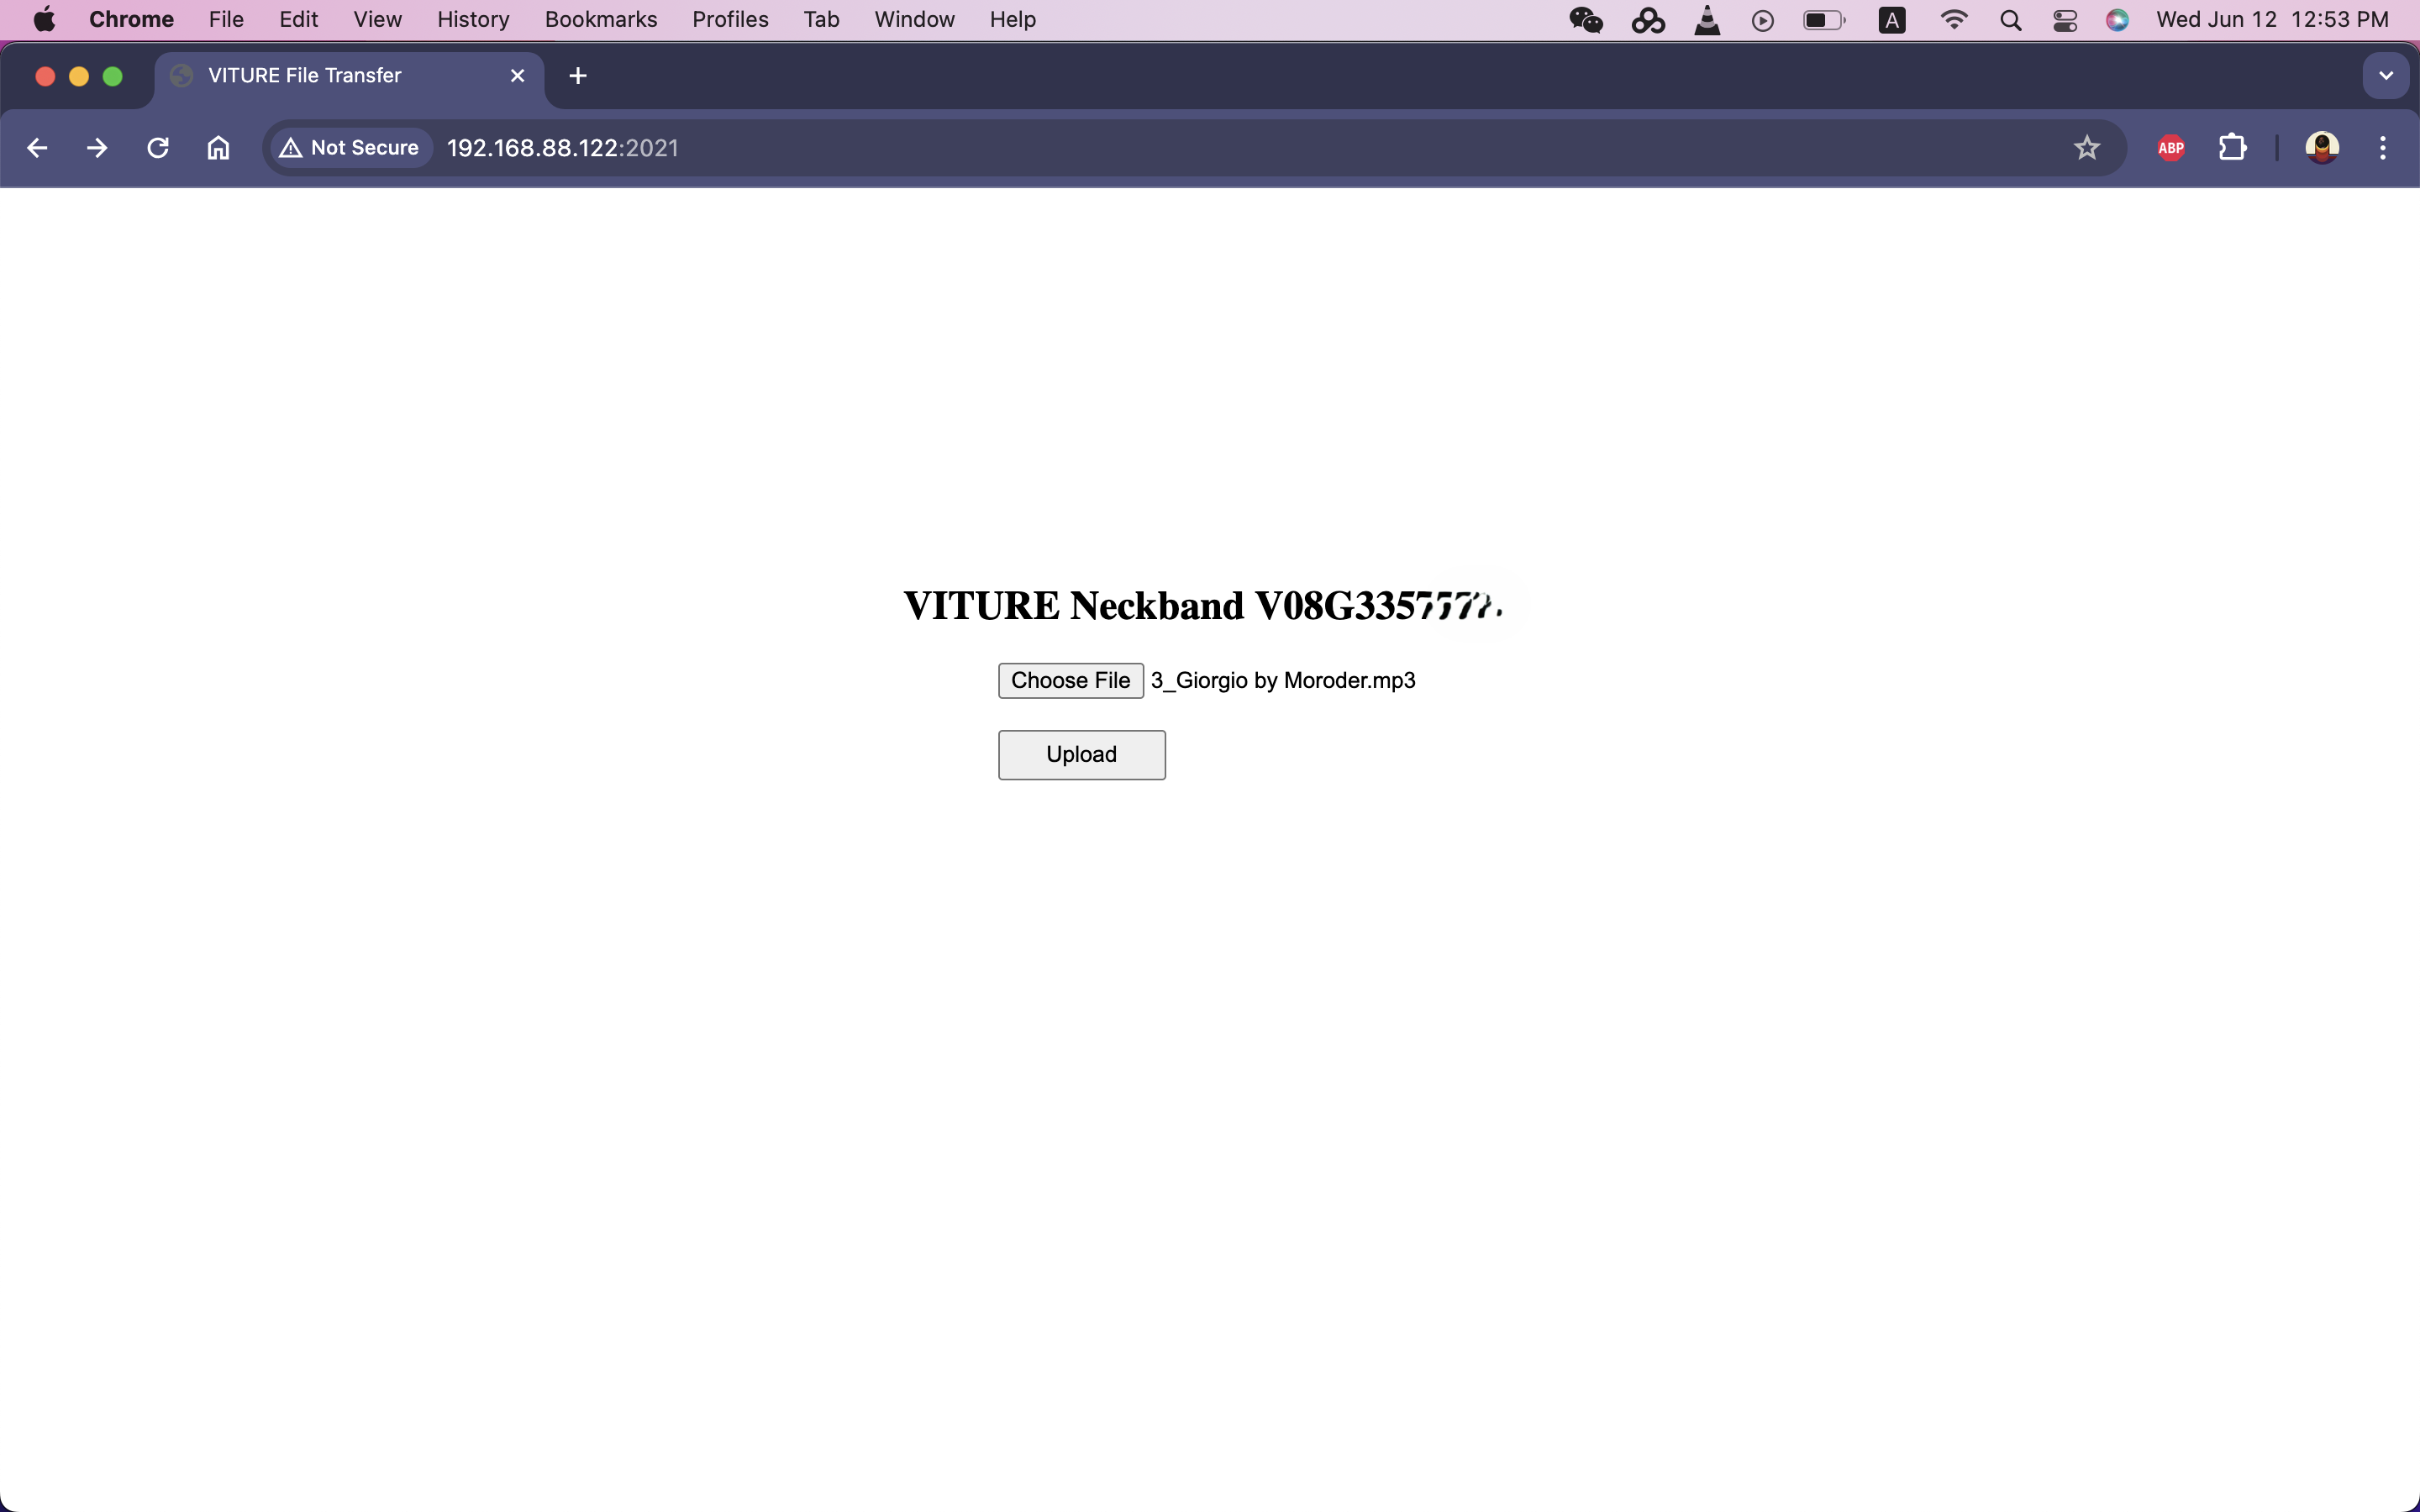
Obtain the Neckband’s IP address by navigating to: Settings > About Neckband > IP address. Note down the IP address.
Open 3D Player app on the Pro Neckband.
On your computer, launch a web browser and enter the Neckband’s IP address followed by :2021 in the address bar. For example: http://192.168.88.123:2021
You will be directed to the file upload page. Click "Choose File" to select files from your computer.
After selecting the files, click "Upload" to begin transferring them to the internal storage of the Pro Neckband.
Additional Notes:
When transferring large files, ensure the Pro Neckband has sufficient battery.
Keep the XR Glasses connected throughout the transfer to prevent the Pro Neckband from entering sleep mode.
Factory Reset Your Pro Neckband
If you plan to resell, dispose of, or give away your Pro Neckband, we recommend performing a factory reset to completely erase your data and protect your privacy. A factory reset can also help resolve severe issues.
Warning: Performing a factory reset will erase all data, apps, and settings on the Neckband. This action cannot be undone. Please back up important data before proceeding.
Power off the Neckband: Make sure the Neckband is completely turned off before starting.
Connect the Glasses: Use the long magnetic cable to connect your Glasses to the USB-C port on the bottom of the Neckband.
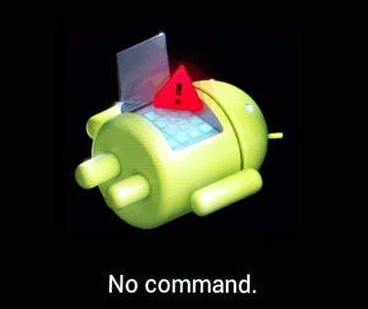
Enter recovery mode: Press and hold the Power button and Volume Up button at the same time until you see the VITURE logo, then release.
Disconnect XR Glasses: Disconnect the USB-C cable from the Glasses, wait a moment then reconnect it.
You should see a tilted robot image: Press and hold the Power button. While holding it, press the Volume Up button. The Neckband will now boot into Android Recovery Mode.
Perform the reset: Use the Volume Up/Down buttons to navigate. Highlight Wipe data / Factory reset. Press the Power button to confirm.