Use the HDMI XR Adapter with Your Devices
This guide will walk you through how to connect the HDMI XR Adapter to your iPhone, game consoles, and other devices with HDMI output. You'll also learn how to power the adapter, charge connected devices, and restart Bluetooth.
Connect the HDMI XR Adapter
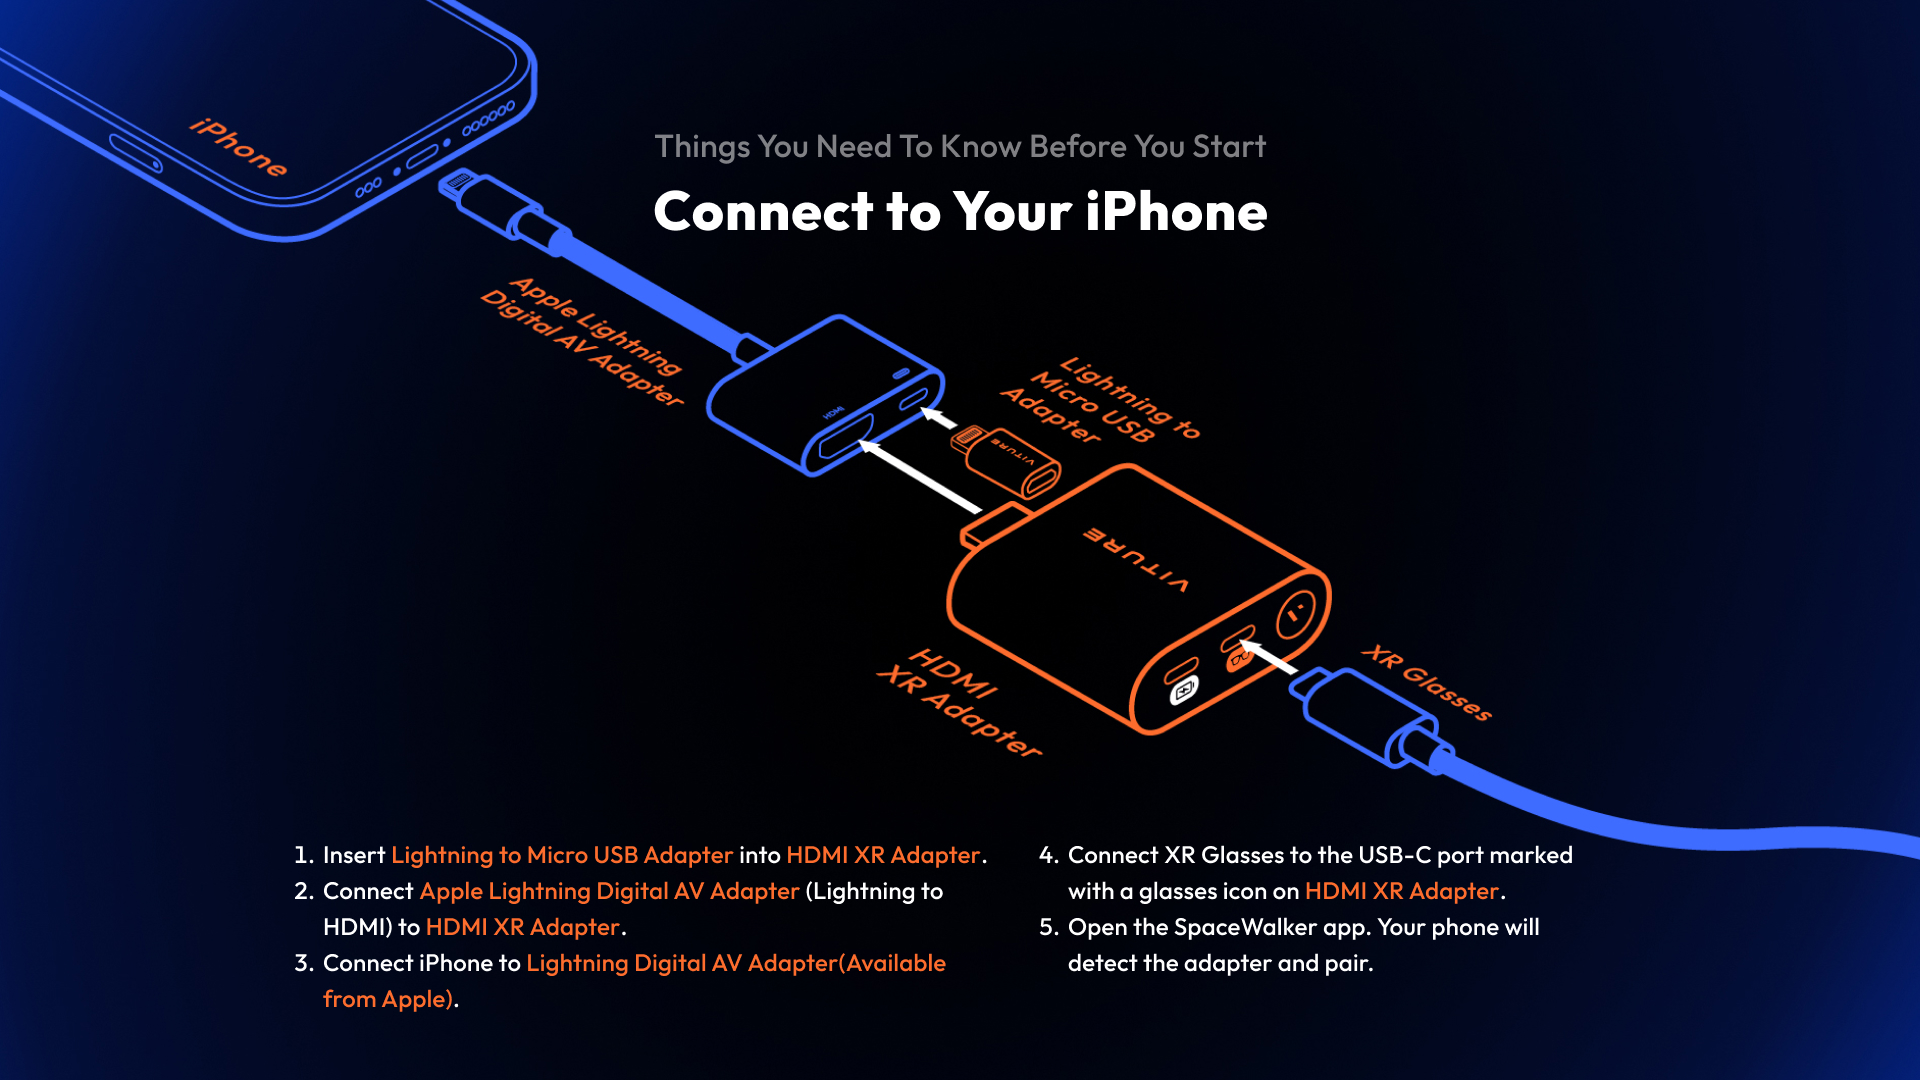
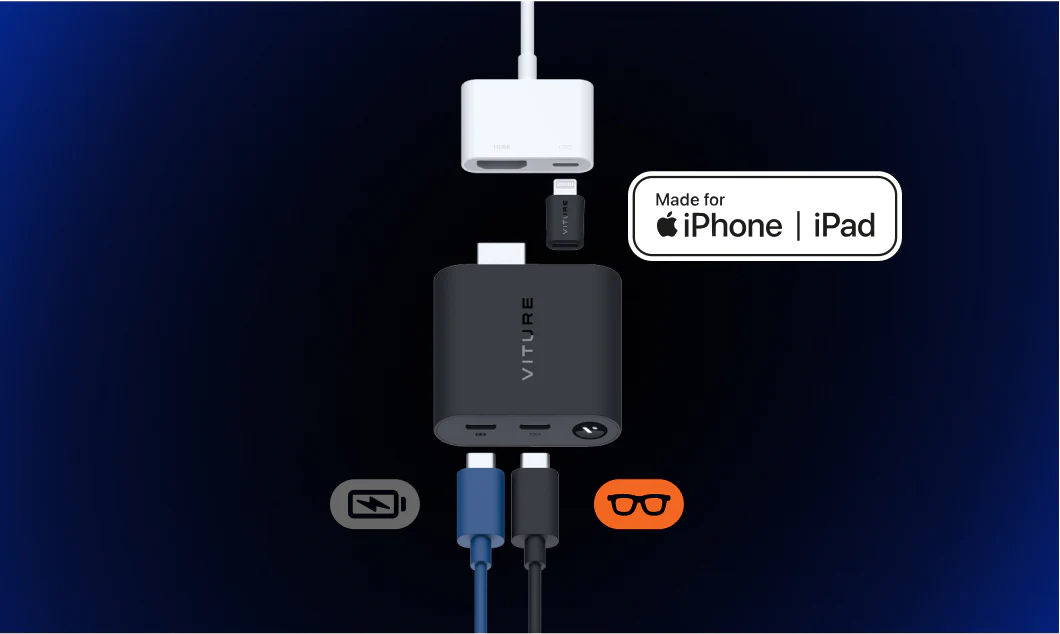
Connect to Your iPhone
Your iPhone's screen will be mirrored on the XR Glasses. A direct connection to the XR Glasses means you can access Netflix, Disney+, Hulu and more without DRM and HDCP restrictions.
To access multiple virtual screens and VR video playback, just open the SpaceWalker app. The HDMI XR Adapter will detect and pair with your iPhone automatically.
Download the SpaceWalker app on the App Store.
Discover more at SpaceWalker for iOS
If you would like to charge your iPhone while you play, insert Lightning to Micro USB Adapter into the HDMI XR Adapter, then connect the charging cable to the USB-C port marked with a power icon on the HDMI XR Adapter.
To charge your iPhone while using the adapter:
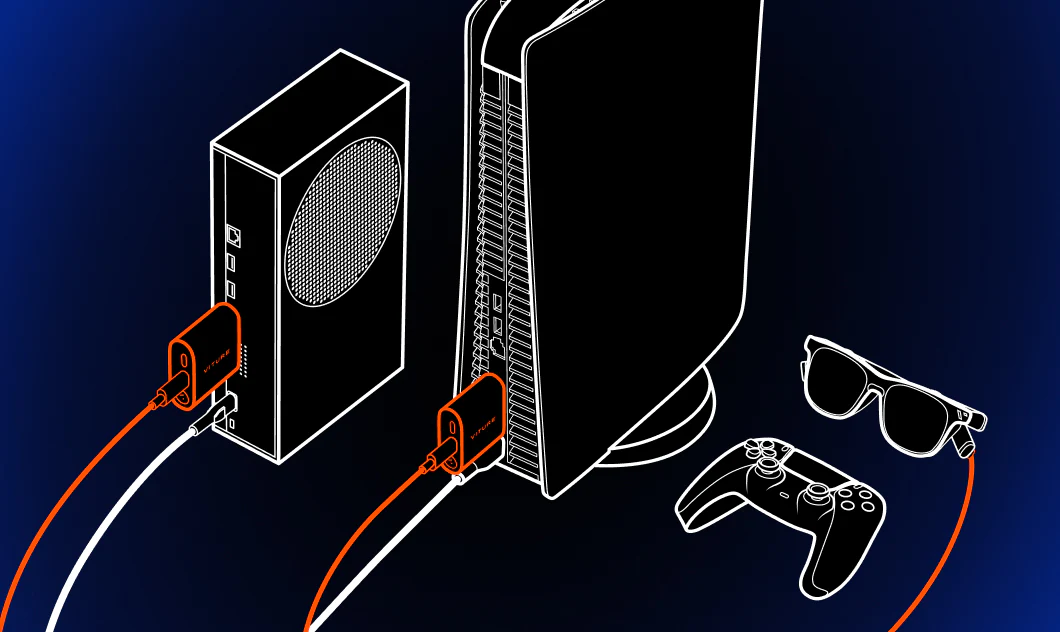
Connect to Game Consoles and Other HDMI Devices
Power the HDMI XR Adapter
To turn the HDMI XR Adapter on, do any of the following:
The HDMI XR Adapter turns off when not in use for 3 minutes.
You can force it to turn off by pressing and holding the button on the HDMI XR Adapter for 8 seconds.
Restart Bluetooth
To restart Bluetooth:
Charge the HDMI XR Adapter
You can read a probable battery percentage by the LED indicator on the button.

| Color | Battery percentage |
|---|---|
| White | 51-100% |
| Yellow | 21-50% |
| Red | 1-20% |
Charge Both iPhone and HDMI XR Adapter
To charge both your iPhone and the adapter simultaneously:
Update the HDMI XR Adapter
This update is required to resolve the compatibility issue between the VITURE Luma Series XR Glasses (including Luma, Luma Pro, and Luma Ultra) and the HDMI XR Adapter.
Important: For Luma Ultra XR Glasses, the HDMI XR Adapter is partially compatible. For Luma and Luma Pro XR Glasses, the HDMI XR Adapter is fully compatible. See this page for detailed compatibility information.
Please follow the instructions below carefully to complete the update.
Requirements
Before starting, make sure you have the following:
Additionally, depending on the update method in Step6, you may also need one of the following:
Update Steps
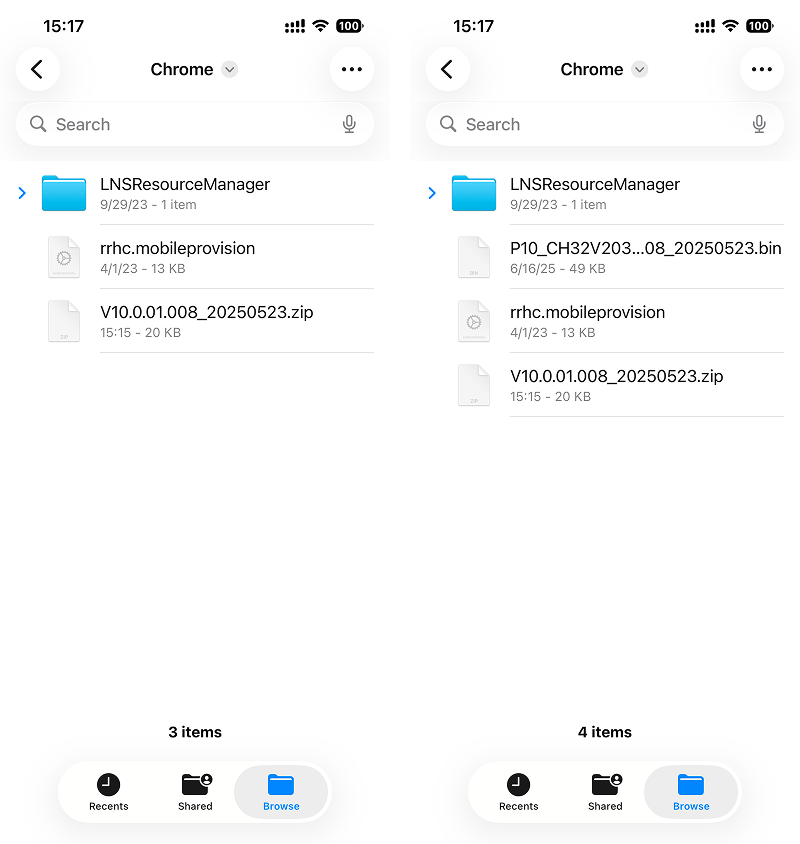
Download the Firmware: On your iPhone or iPad, visit this link to download the firmware file. Remember the folder where the file is saved.
Unzip the File: The firmware file is in .zip format. Tap the file to unzip it.
Install TestFlight: Open this link and follow Step 1 to install TestFlight.
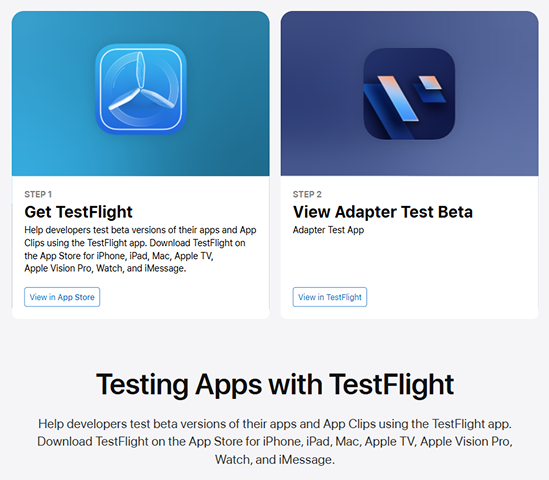
Install the Test App: Follow Step 2 on the same page and tap "View in TestFlight" to install the test app.
If the installation fails, fully close TestFlight and reopen it; the test app should appear for installation.
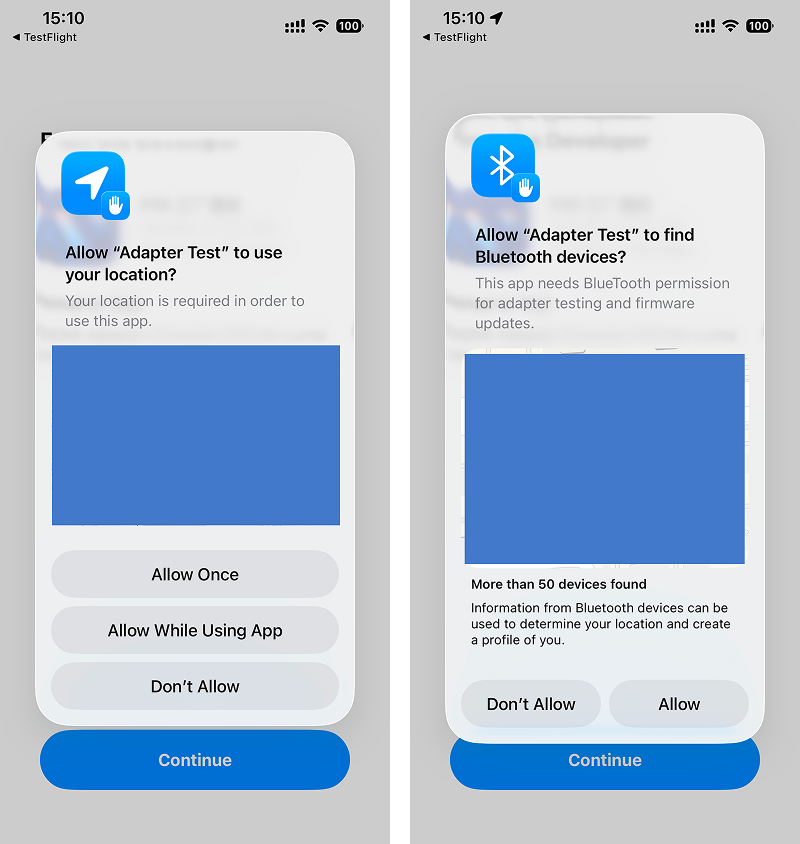
Launch the Test App: Open the app and allow Location and Bluetooth permissions (required for Bluetooth communication). Then tap Start Testing.
Connect the Adapters: Choose one of the following
6.1 Connect the HDMI XR Adapter and Lightning Digital AV Adapter to your iPhone or iPad as you normally would. You do not need to connect the XR Glasses at this stage—just ensure the HDMI XR Adapter is powered. If you are using a USB‑C iPhone or iPad, use a USB-C Digital AV Multiport Adapter to connect to the HDMI XR Adapter.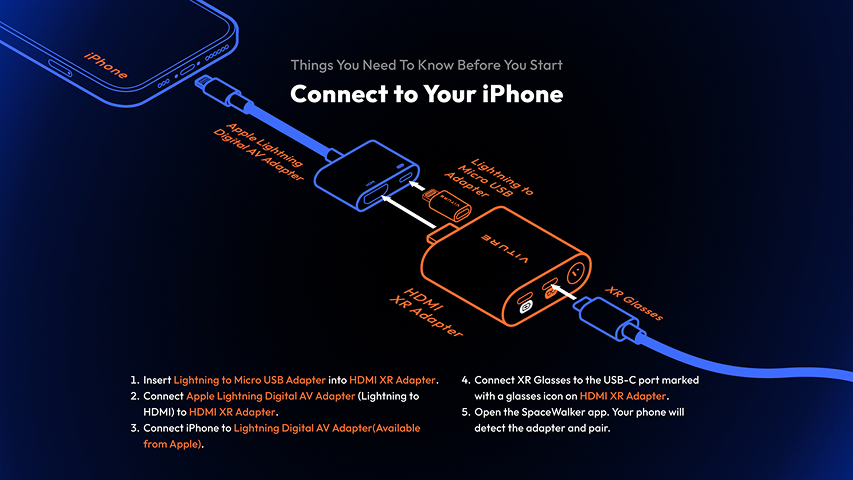
6.2 Connect the HDMI XR Adapter to your computer or PlayStation, and power the adapter using its USB-C charging port.
Start the Update: In the app, tap Start Testing. The adapter details should appear. If they do not, disconnect and reconnect the adapters, then try again.
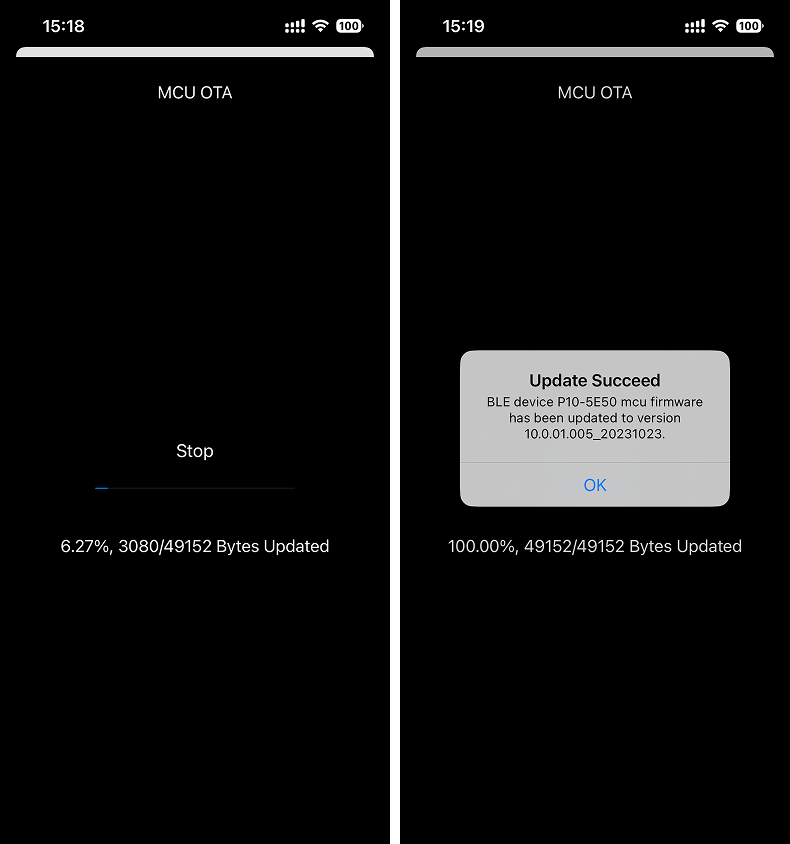
Select and Install Firmware: Tap "OTA" in the top-right corner and select MCU. When prompted, choose the unzipped firmware file you downloaded earlier.
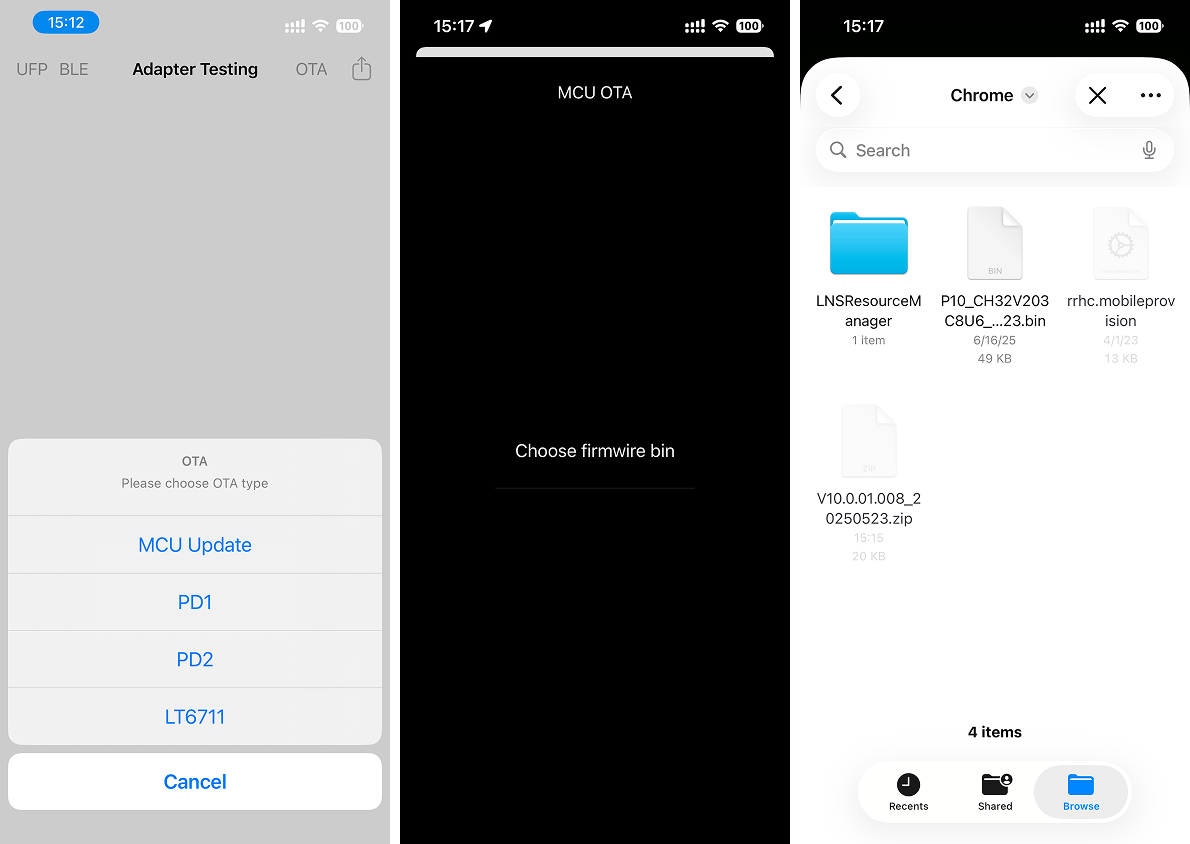
If you see a prompt asking for a redemption code, simply ignore or cancel it. No code is required to complete the update.
Wait for Completion: The update will begin. Do not disconnect any devices during this process. When the update finishes, a confirmation dialog will appear.